
Firstly, this is a somewhat messy process with the cutting of the loom so I recommend having a trashcan on hand to scrape the leftovers into.
First, pick your piece of equipment to loom. In this case we'll be using the Sentry LX from NZXT. As you can see from this photo there's quite a bit of wiring to it.
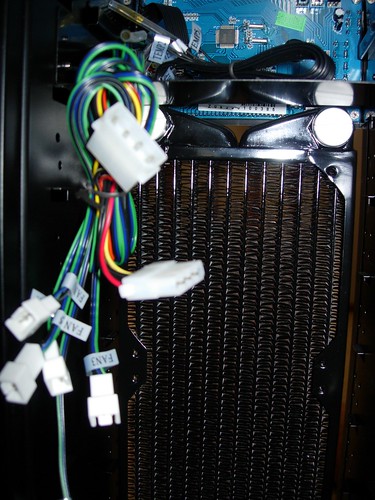
I planned to split this into 4 groups. One for the temperature probes which will be routed later, one for the rear 2 fans, one for the front 3 fans, and the power cord.
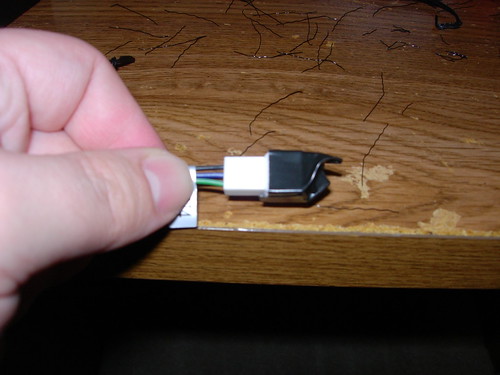
First we need to prepare the piece of cable to be fed through the loom. I used some electrical tape to smooth out the sharp corners on the connectors as the first one I fed through would constantly snag and made it 10x harder than it needed to be.
Next we need to do what I call "opening the loom". To do this you'll want a screw driver. I prefer a philips as it's got a pointed tip and is less likely to snag. Feed the loom onto the screw driver until it begins to expand like this.

Pull the wire loom back on itself to keep it open, or you can try fishing the connector through the opening whilest the screw driver is inserted. Remove the screw driver. Now, and for this part I've no photo's, you'll need to work the connecter through the loom. Do this by gripping firmly behind the connector. Then pust the loom using your free hand over the top of the connector until it begins to bunch up. Once you've done that release your grip behind the connecter allowing the loom to pass over the end of the cable/plug. Repeat this process until you've worked the loom all the way down the cable. Make sure to stop every few feeds and smooth out the loom that's been fed on to keep it from bunching up. When you near the end of the cable cut the loom leaving yourself just enough to finish covering the wire.
Lastly, secure the ends. If you're using exposed wiring or have the tools to remove the connectors you may wish to use heat shrink. I did not have this luxury so I instead used electrical tape to secure the ends.
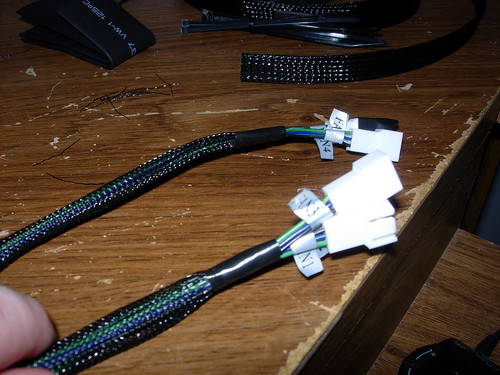
I think they turned out well. If you wish to feed more than one wire through the loom as I did, simply wait until all the wires are threaded through the loom to tape the ends. Also know that the loom will have a tendency to bunch up near the end as you feed it while there is already a wire there, this is because of the friction between the existing wiring and the loom. Once you've got the new cable threaded through simply smooth the loom back out.
