Project Log: The way a Cavalier 3 Should Be! (56k beware!)
-
gvblake22
- Legit Extremist

- Posts: 1111
- Joined: Thu Feb 17, 2005 9:39 am
- Location: Northern Michigan
- Contact:
Yes, all cutting was done with a 35,000rpm Dremel with a Fiberglass Reinforced Cutting Wheel. After I made the cuts I filed them all down with a medium sized metal bastard file.Merlin wrote:You did all that cutting with a dremel???
The trick to cutting with a Dremel is to just take your time. Be ready to put in many hours just doing a few cutting jobs
I split all my cutting up into two afternoons worth.
-
killswitch83

- Legit Extremist
- Posts: 1747
- Joined: Tue Jun 21, 2005 3:45 pm
- Location: South Carolina
-
gvblake22
- Legit Extremist
- Posts: 1111
- Joined: Thu Feb 17, 2005 9:39 am
- Location: Northern Michigan
- Contact:
Pics Pics Pics!!!
Yep, it's definately 3am while I'm starting this post 
Nothin' like a little late night modding to get the blood flowin'!!
ANYWAY, I did A LOT of work on the lighting situation and here's what I ended up with...
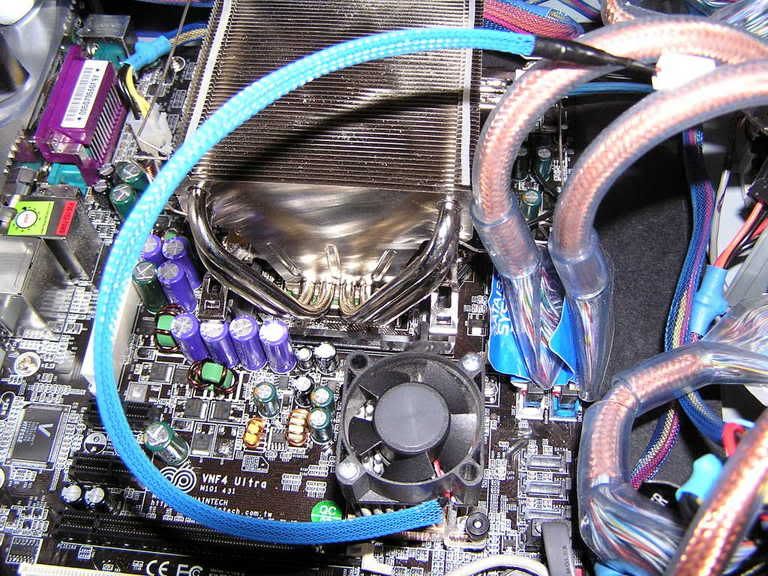
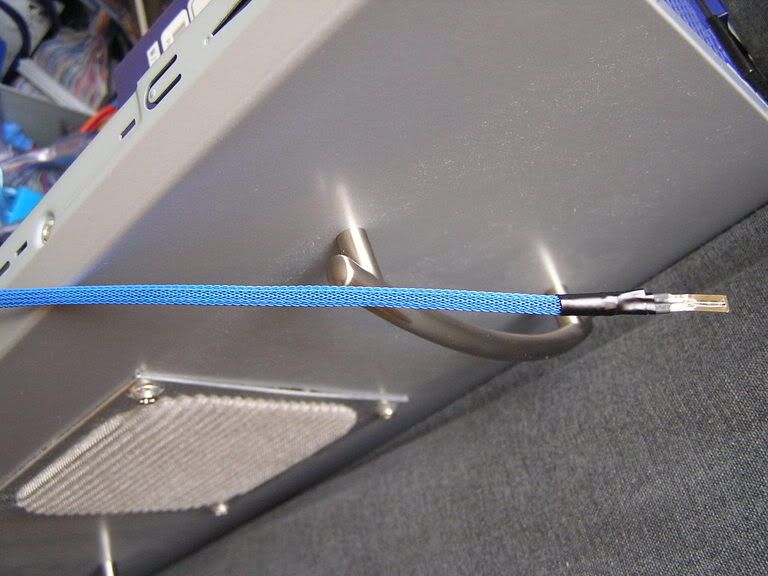
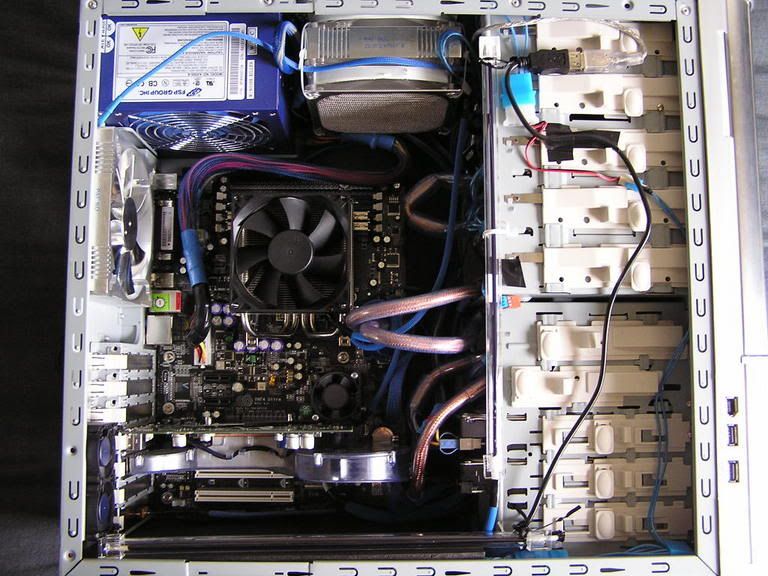
First task was to use up all that wonderful UV Blue sleaving; pffft, who needs heat shrink?!
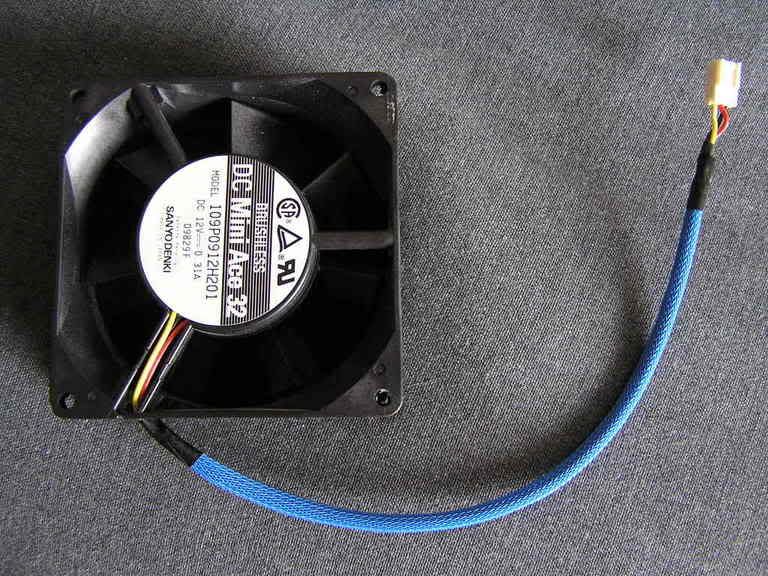
Chipset fan:
SATA cable:

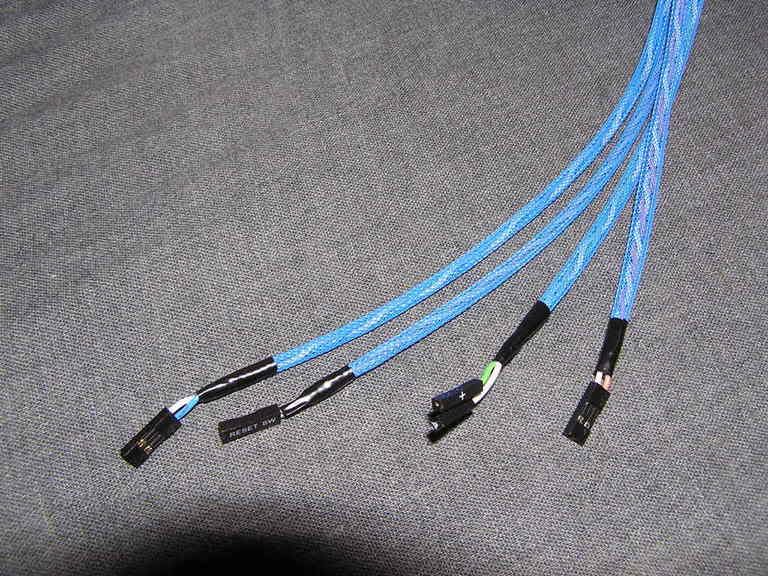
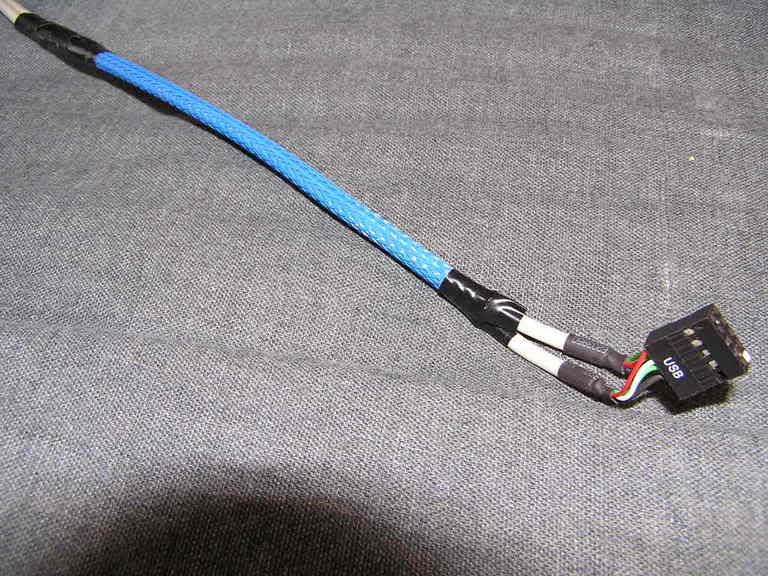
Case Front I/O cables:
Temperature Probe:
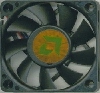
Heatsink Fan:
Internal USB Headers:
and the cables for the UV CCFL's:
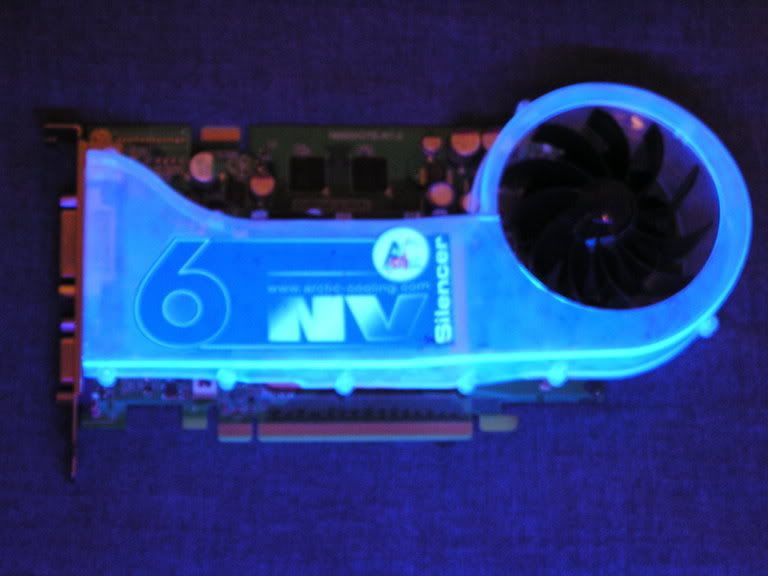
After the sleaving was nocked out, I busted out the UV reactive paint!!!
An ordinary NV Silencer?:
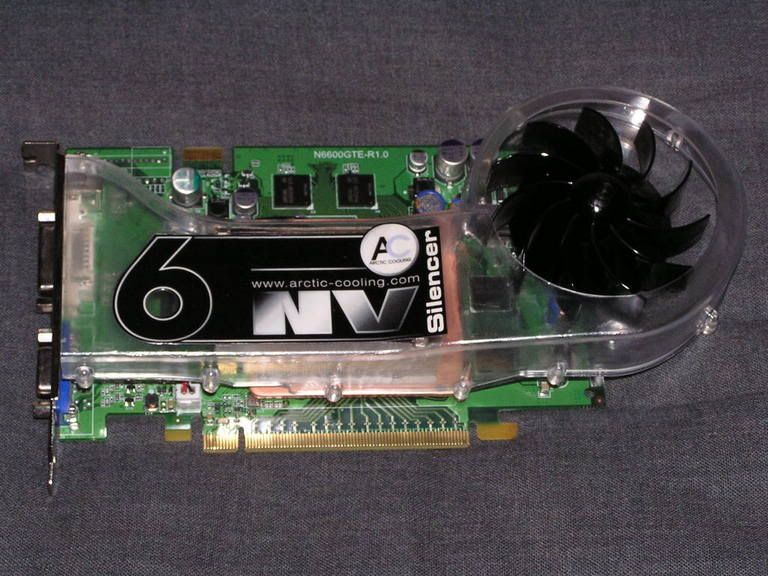
...only to the untrained eye!!!:
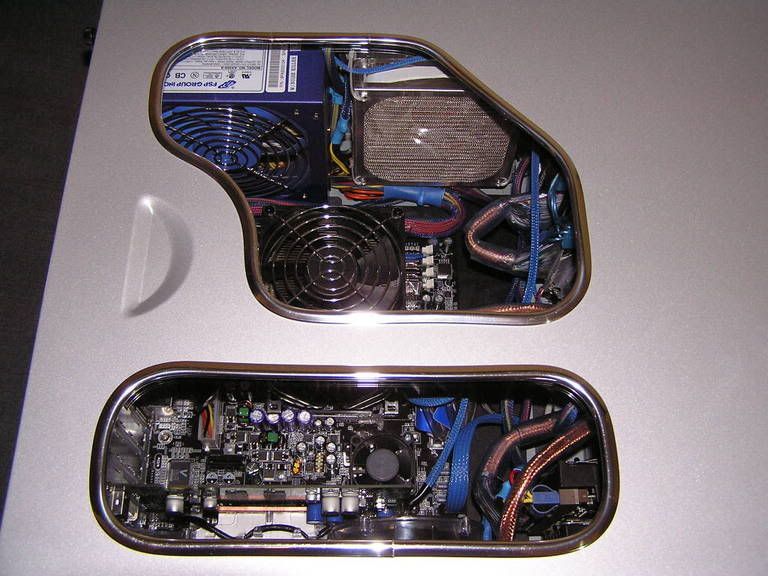
Next up I decided I was gonna modify the look of the top intake a little bit because I made one edge of the hole a little too large and it stuck out the side of that square metal dust guard I had before. This way it looks the way it should; round:
So I just put the dust filter on the inside instead:
Now to put it all together!!!
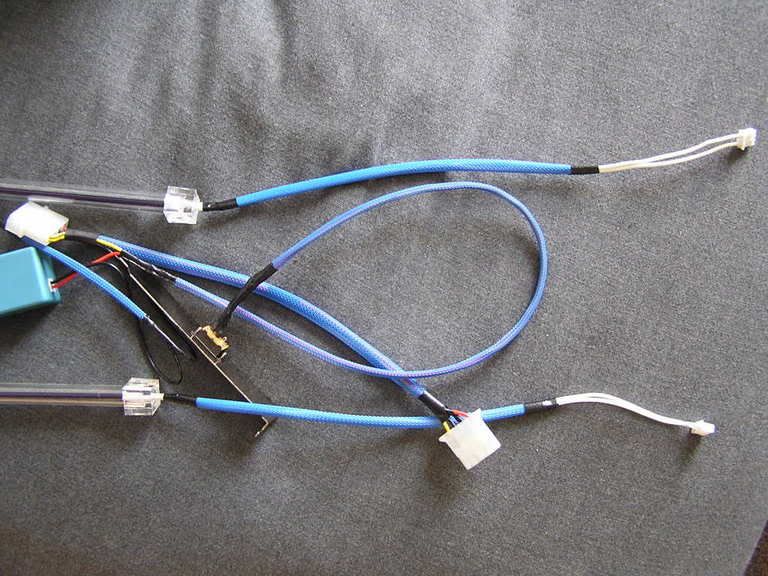
Again, the wiring took waaay too long :
:
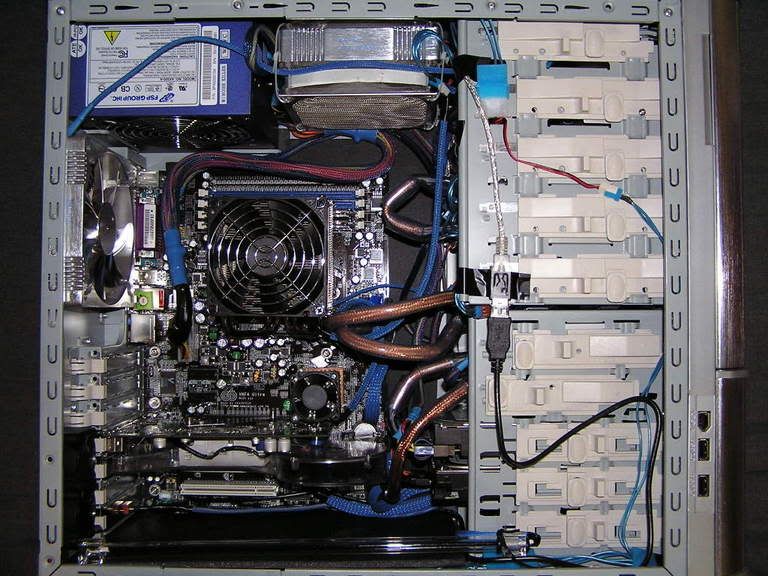
...the rats nest:
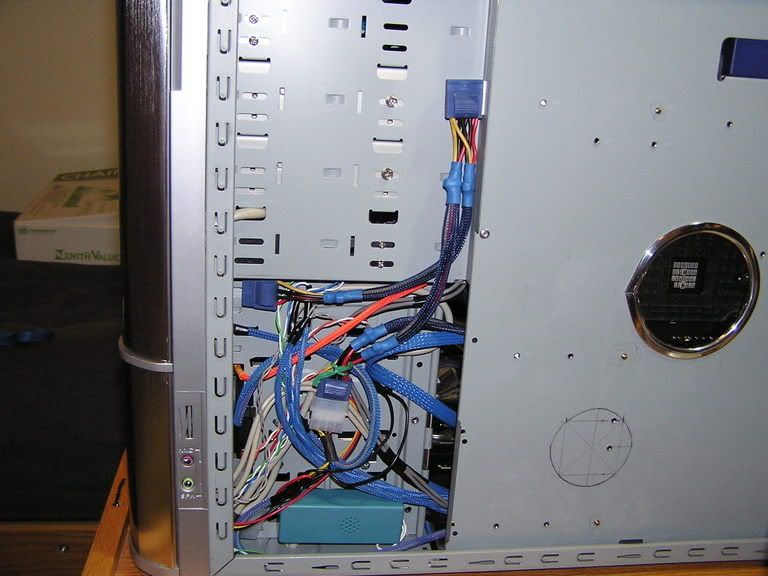
as the spectator sees it:
Nothin' like a little late night modding to get the blood flowin'!!
ANYWAY, I did A LOT of work on the lighting situation and here's what I ended up with...
First task was to use up all that wonderful UV Blue sleaving; pffft, who needs heat shrink?!
Chipset fan:
SATA cable:
Case Front I/O cables:
Temperature Probe:
Heatsink Fan:
Internal USB Headers:
and the cables for the UV CCFL's:
After the sleaving was nocked out, I busted out the UV reactive paint!!!
An ordinary NV Silencer?:
...only to the untrained eye!!!:
Next up I decided I was gonna modify the look of the top intake a little bit because I made one edge of the hole a little too large and it stuck out the side of that square metal dust guard I had before. This way it looks the way it should; round:
So I just put the dust filter on the inside instead:
Now to put it all together!!!
Again, the wiring took waaay too long
...the rats nest:
as the spectator sees it:
-
gvblake22
- Legit Extremist
- Posts: 1111
- Joined: Thu Feb 17, 2005 9:39 am
- Location: Northern Michigan
- Contact:
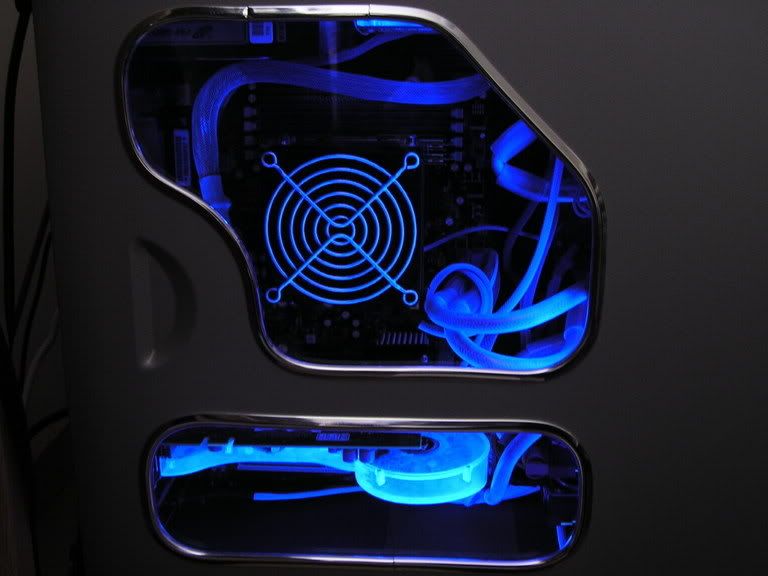
And now for the better night shots I promised you all!!!

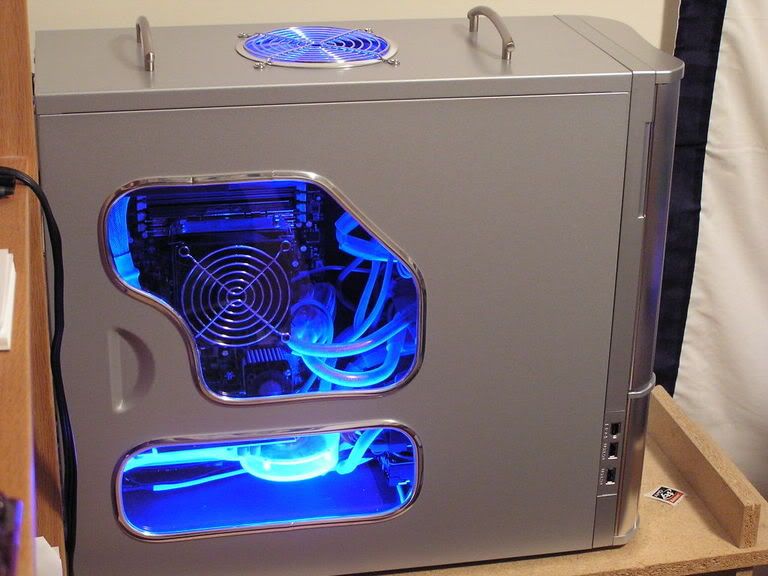
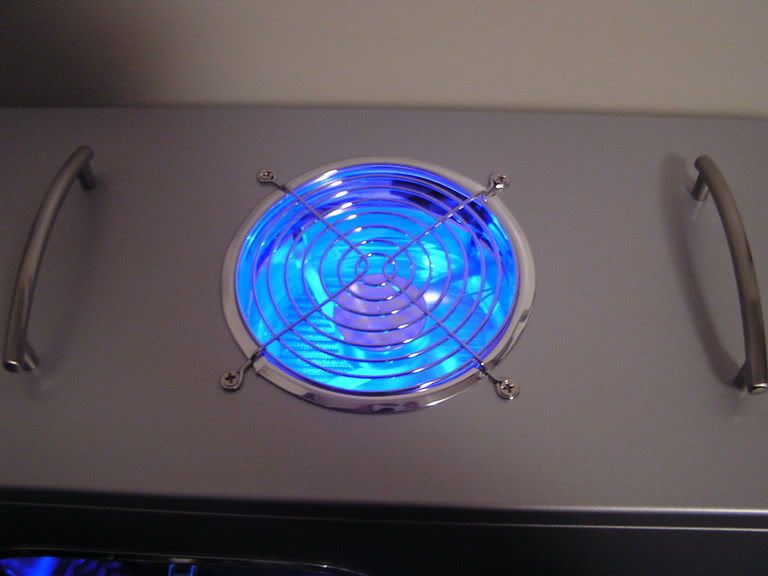
I am still contemplating painting up the wire grill on the heatsink fan with the blue UV reactive paint to help tie it all together. I'll probably also add the other 12" UV CCFL along the top of the case.
Overall, I'm pretty tired, but pretty happy with the results. Hopefully you guys like it too; but if not, then just go . . . . . . . .
Until next time!
-
killswitch83
- Legit Extremist
- Posts: 1747
- Joined: Tue Jun 21, 2005 3:45 pm
- Location: South Carolina
-
gvblake22
- Legit Extremist
- Posts: 1111
- Joined: Thu Feb 17, 2005 9:39 am
- Location: Northern Michigan
- Contact:
HAHA, thanks! I would definately have to agree, this turned out MUCH better than my first mod project.killswitch83 wrote:Jesus H Christ, lol. very very nice; much better than the last mod IMO; one thing though, did you paint the inside or outside of the Silencer? It looks great, for real
I definately just painted the outside of the silencer. It's only one coat of paint too! it is a pretty tedious task though because the paint I got only came with this little brush-in-cap that was like the size of a fingernail polish applicator brush.
Oh yeah, I forgot to mention that, in case you didn't notice, I also painted the hubs of the two 40mm fans so they can get the attention they deserve.
-
killswitch83
- Legit Extremist
- Posts: 1747
- Joined: Tue Jun 21, 2005 3:45 pm
- Location: South Carolina
-
killswitch83
- Legit Extremist
- Posts: 1747
- Joined: Tue Jun 21, 2005 3:45 pm
- Location: South Carolina
-
Illuminati

- Site Admin

- Posts: 2378
- Joined: Mon Oct 06, 2003 8:48 am
- Location: Wright City, Missouri, USA
- Contact:
-
killswitch83
- Legit Extremist
- Posts: 1747
- Joined: Tue Jun 21, 2005 3:45 pm
- Location: South Carolina
Already got some ideas for mine as well Justin; instead of the Cavalier 3 though, I will be using a Thermaltake Tsunami Dream case (silver finish) without the side window, because I have something very special in mind for that solid panel (oh, it involves a window, but a very special type that will probably take me a couple of days to cut the pattern out just right), along with some hardware goodies like water cooling throughout, UV components and paint, amongst other things, and that's not getting into modding the rest of the case ; be prepared, be VERY prepared, lol 


-
killswitch83
- Legit Extremist
- Posts: 1747
- Joined: Tue Jun 21, 2005 3:45 pm
- Location: South Carolina
-
gvblake22
- Legit Extremist
- Posts: 1111
- Joined: Thu Feb 17, 2005 9:39 am
- Location: Northern Michigan
- Contact:
LOL, exactltyaudiophile wrote:haha i was thinking the exact same thing. i was thinking, "man... forget an upgrade... it'd hardly be worth it after all that work"
I wanted to RMA the mobo because a rear USB plug broke off but I don't want to have to pull all the wiring off!
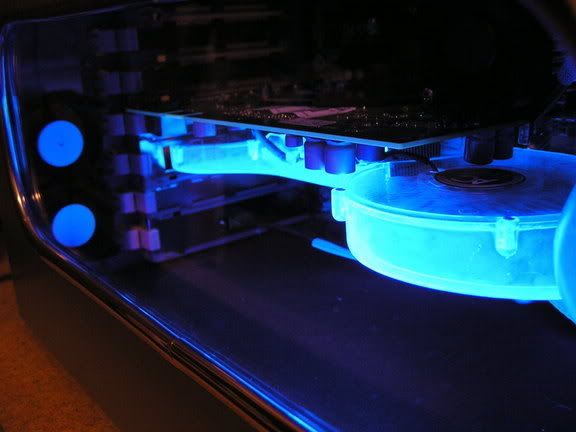
Anyway, I got the second UV CCFL installed:
As well as painting the fan grill with the UV reactive paint:
I also threw up a couple stickers I had lying around just for kicks:
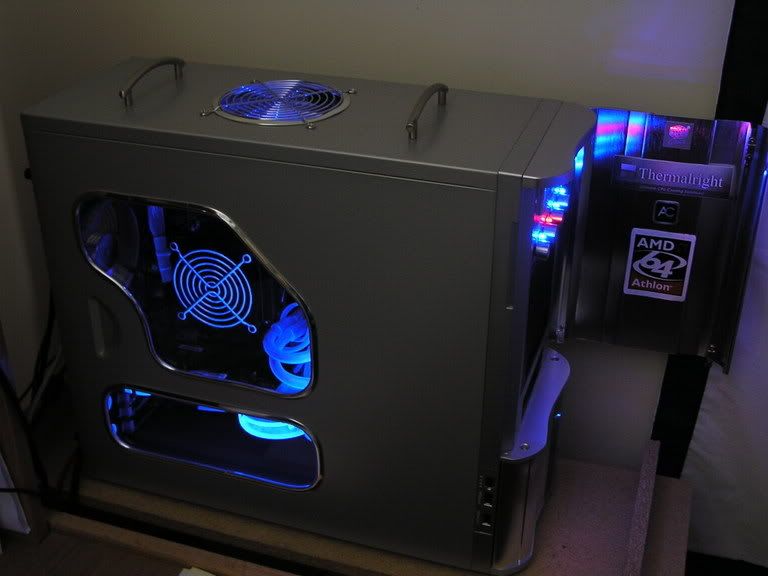
I really like how the lighting turned out. Don't know if I'll have anymore updates from here on out though
MAYBE another window on the other side panel if I get ambitious...
Thanks for all your kind words, I really appreciate it after all the hard work!
G'night
Your turn Paul
Last edited by gvblake22 on Tue Sep 27, 2005 6:40 am, edited 1 time in total.
-
killswitch83
- Legit Extremist
- Posts: 1747
- Joined: Tue Jun 21, 2005 3:45 pm
- Location: South Carolina