Bubbas Water Cooled HAF-922
Posted: Thu Aug 27, 2009 8:15 am
Decided to finally do a full on water cooling setup. This won’t be a 100% water cooled system (yet) pesky bills. This is my journey thus far and wanted to share what I have learned.
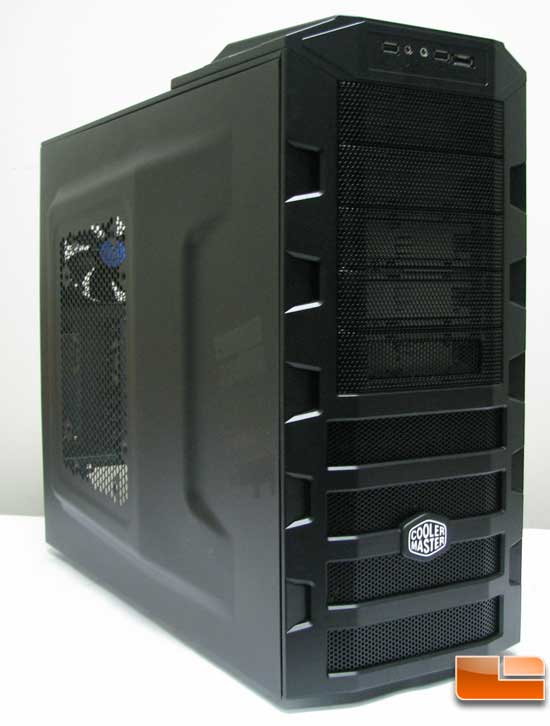
The Case
Cooler Master HAF-922 midtower Review Linky
The water cooling parts
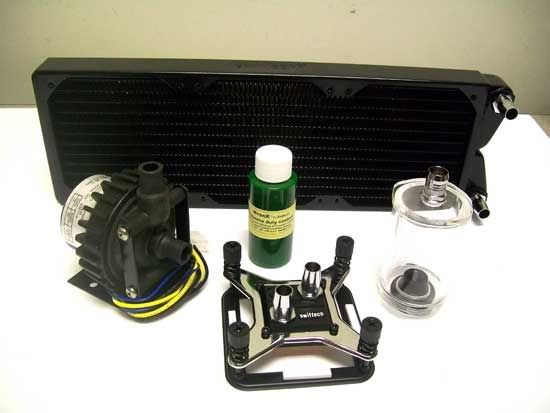
1x Swiftech Apogee GTZ Core i7 Water Block
1x Swiftech MCR320 Quiet Power 3x120mm Radiator
1x Swiftech MCP655-B 1/2in. Water Pump
1x Swiftech 1/4" BSPP x 1/2" Barb Chrome Plated Fitting (Set of 2)
1x Swiftech HydrX Coolant UV Reactive
1x Danger Den Fillport Res
Not show (slow mail)
1x Danger Den Delrin Drain Port
1x Danger Den Delrin Tee
3x Danger Den 1/2" shorty fittings
The Plan
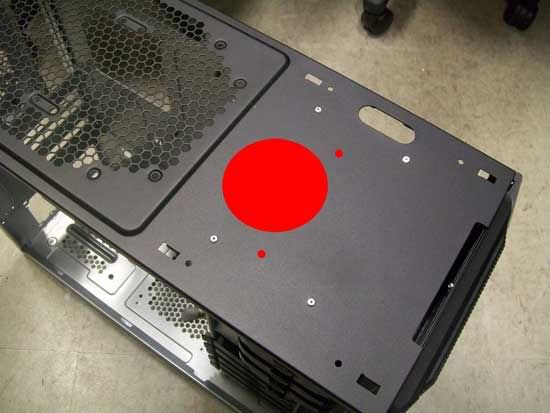
The plan is to take and cut about a 4”ish hole in the top of the case where the end of the 3x120 RAD ends up so it can breathe and not put hot air back into the case.
With place for a breather hole, the control pod still will cover it, defeating the purpose of the hole. So to let the air out of the control pod we need to make another hole (or sets thereof). On the back of the pod there is a grill detail, I’m just going to make it functional by cutting out the flat areas between the ribs.
Misc thoughts and observations
Being this is the first true custom water cooled setup I have assembled I learned a couple things along the way.
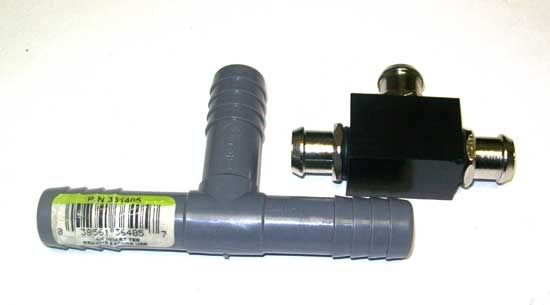
First and foremost, Home Depot and Lowes may be cheap for hose and fittings BUT just save up the extra for good fittings. In the above image is the smallest tee fitting I could find at Lowes or Home Depot by me. Next to it is a Danger Den delrin tee with stubby fittings. See how much smaller the DD tee is, but it was $15 with the 3 stubby fittings as compared to the 1.89 for the Lowes plastic tee. I did find a tee at a local pluming shop that was meant for a new plastic water line system that is out. Small like the Danger Den, but only $6.50. Thinking about picking up a couple for the hell of it, that and I need to work in a drain line somewhere.
Same goes for the tubing. I got a 10’ roll of 1/2” vinyl tubing from Home Depot to do the planning and what not. Yeah it works but I had several sections of tubing with bad spots in it. Suck it up and buy something like Masterkleer 7/16 x 5/8 for on the cheap at around .60/ft, Clearflex 60 at $1.60/ft (poor man’s Tygon) or Tygon if your wallet is a little heavy at $3/ft and up.
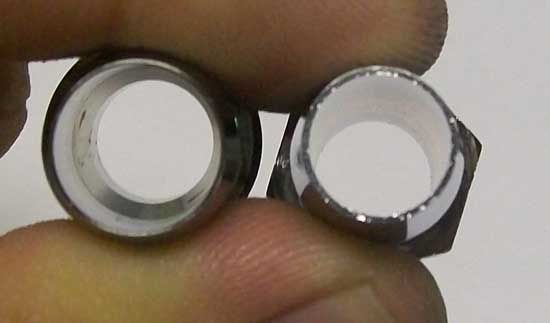
Not all fittings are created equal. Left is a Danger Den 1/2” ‘Fatty’, right is a stock 1/2” Swiftech fitting. The fatty fitting has more throat, flow is the goal, research your fitting choice.
Where I’m at as of now…
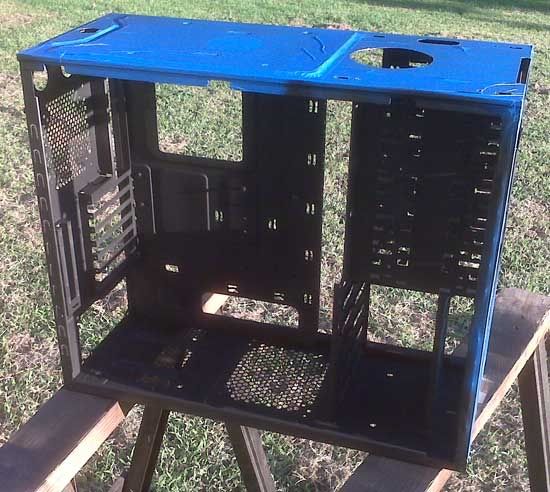
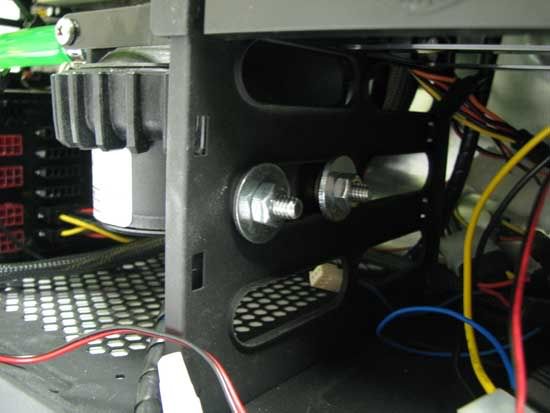
First I cut up the I/O pod slots, blow hole, and the hole for the fill port on the back. Then got in my head the case needed to be blacked out. So out came the painters tape to protect the outside finish and the rattle canning started. Yes I should have drilled the rivets, disassembled it and what not, I was lazy shot me, turned out descent though. Oh and no flack over the condition of the yard, wasn’t my yard.
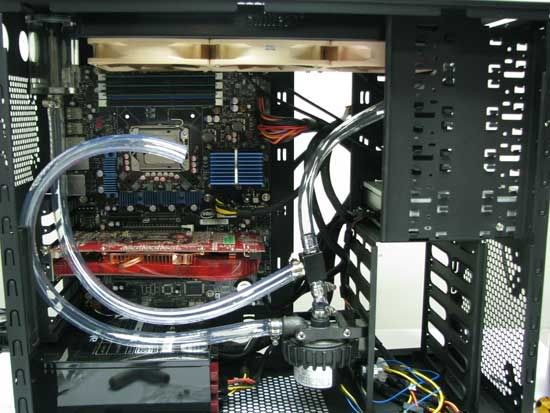
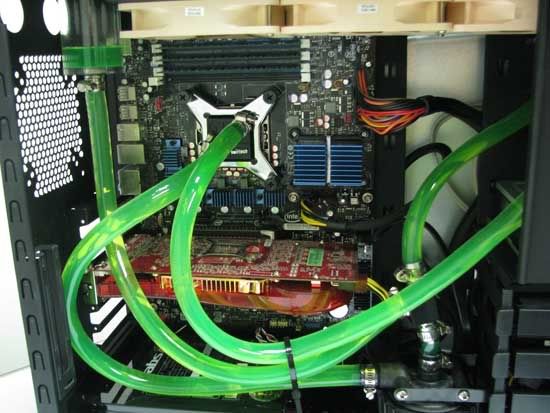
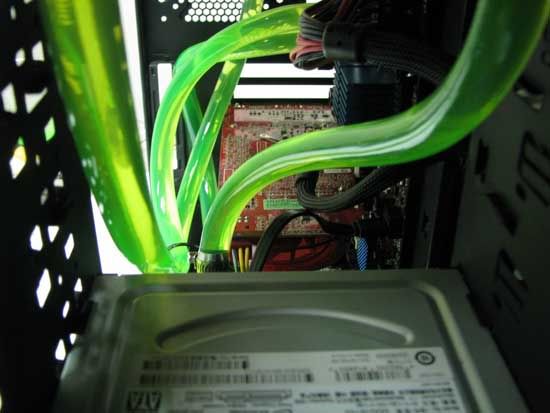
Well was humming along assembling stuff and realized that I hadn’t put CPU backing plate for the block on the board. So on lunch I pull the board and put the block on and start leak testing.
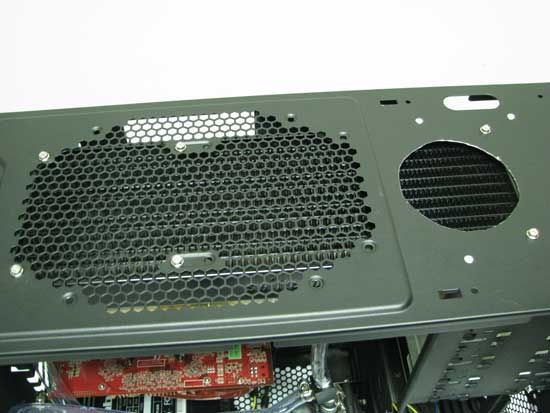
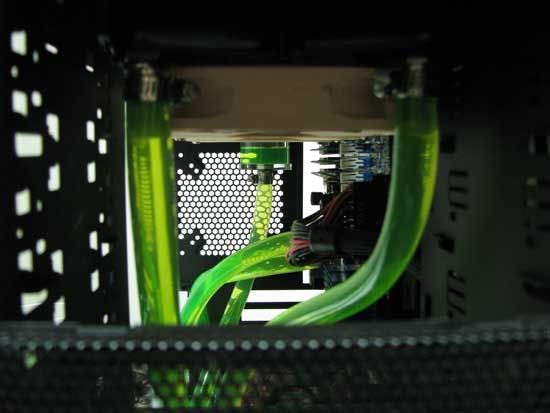
Shot form the top before I put the I/O pod back on. Yes the blow hole looks like a beaver gnawed it out, didn't feel like dropping $30 on a hole saw to make 1 hole that was going to be covered. If this becomes habit, then I'll drop the coin.
I'll take some more pics at lunch and post them up.
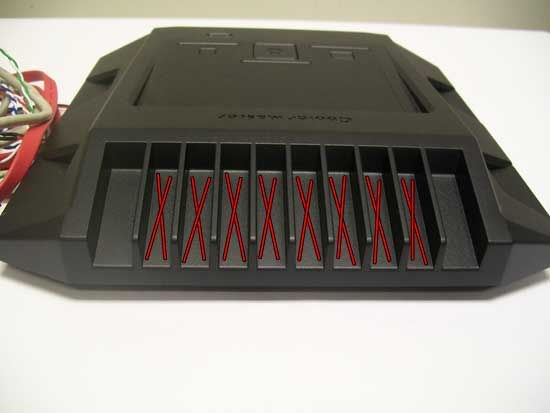
The Case
Cooler Master HAF-922 midtower Review Linky
The water cooling parts
1x Swiftech Apogee GTZ Core i7 Water Block
1x Swiftech MCR320 Quiet Power 3x120mm Radiator
1x Swiftech MCP655-B 1/2in. Water Pump
1x Swiftech 1/4" BSPP x 1/2" Barb Chrome Plated Fitting (Set of 2)
1x Swiftech HydrX Coolant UV Reactive
1x Danger Den Fillport Res
Not show (slow mail)
1x Danger Den Delrin Drain Port
1x Danger Den Delrin Tee
3x Danger Den 1/2" shorty fittings
The Plan
The plan is to take and cut about a 4”ish hole in the top of the case where the end of the 3x120 RAD ends up so it can breathe and not put hot air back into the case.
With place for a breather hole, the control pod still will cover it, defeating the purpose of the hole. So to let the air out of the control pod we need to make another hole (or sets thereof). On the back of the pod there is a grill detail, I’m just going to make it functional by cutting out the flat areas between the ribs.
Misc thoughts and observations
Being this is the first true custom water cooled setup I have assembled I learned a couple things along the way.
First and foremost, Home Depot and Lowes may be cheap for hose and fittings BUT just save up the extra for good fittings. In the above image is the smallest tee fitting I could find at Lowes or Home Depot by me. Next to it is a Danger Den delrin tee with stubby fittings. See how much smaller the DD tee is, but it was $15 with the 3 stubby fittings as compared to the 1.89 for the Lowes plastic tee. I did find a tee at a local pluming shop that was meant for a new plastic water line system that is out. Small like the Danger Den, but only $6.50. Thinking about picking up a couple for the hell of it, that and I need to work in a drain line somewhere.
Same goes for the tubing. I got a 10’ roll of 1/2” vinyl tubing from Home Depot to do the planning and what not. Yeah it works but I had several sections of tubing with bad spots in it. Suck it up and buy something like Masterkleer 7/16 x 5/8 for on the cheap at around .60/ft, Clearflex 60 at $1.60/ft (poor man’s Tygon) or Tygon if your wallet is a little heavy at $3/ft and up.
Not all fittings are created equal. Left is a Danger Den 1/2” ‘Fatty’, right is a stock 1/2” Swiftech fitting. The fatty fitting has more throat, flow is the goal, research your fitting choice.
Where I’m at as of now…
First I cut up the I/O pod slots, blow hole, and the hole for the fill port on the back. Then got in my head the case needed to be blacked out. So out came the painters tape to protect the outside finish and the rattle canning started. Yes I should have drilled the rivets, disassembled it and what not, I was lazy shot me, turned out descent though. Oh and no flack over the condition of the yard, wasn’t my yard.
Well was humming along assembling stuff and realized that I hadn’t put CPU backing plate for the block on the board. So on lunch I pull the board and put the block on and start leak testing.
Shot form the top before I put the I/O pod back on. Yes the blow hole looks like a beaver gnawed it out, didn't feel like dropping $30 on a hole saw to make 1 hole that was going to be covered. If this becomes habit, then I'll drop the coin.
I'll take some more pics at lunch and post them up.