Turning an Old Monitor Into a Fishtank

Want to show off that smoking system or your latest creation?
User avatar
Illuminati
Site Admin
Site Admin
Posts: 2378
Joined: Mon Oct 06, 2003 8:48 am
Location: Wright City, Missouri, USA
Contact:

Turning an Old Monitor Into a Fishtank

Post by Illuminati »

My wife and I are currently working on a project together and thought some of you readers would be interested in seeing how we are turning an old, dead monitor into a fish tank!

Image

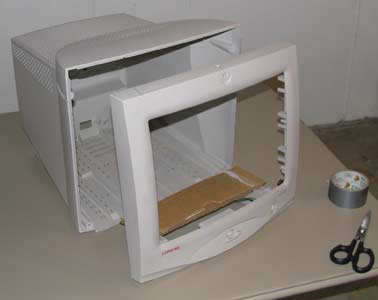
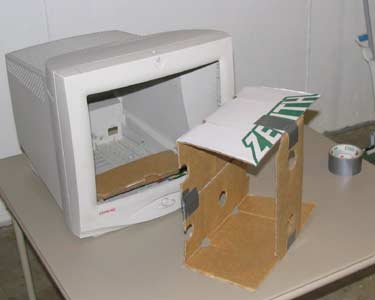
First, we just completely gutted the monitor... The fried tube, wires, microphone... all gone. The only exception is we left the power and menu buttons on the front as possible ways to turn on/off power to things such as lights, tank bubbles, or filter. We are not sure how that all is going to pan out.
Image

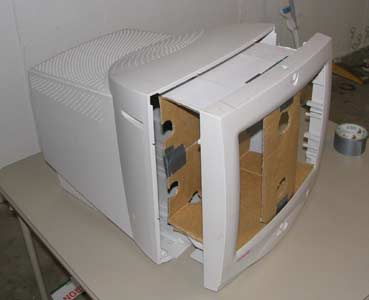
As planning for the fish tank size and making sure our measurments were correct, I made a model tank out of an old cardboard box that was almost empty and good ole duct tape! I also use some cardboard scrap to make a "more level" space for the cardboard sample tank to sit on inside the monitor shell.
Image

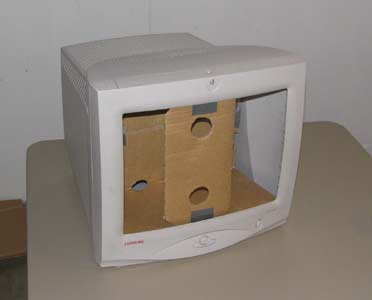
Here is the box tank sitting on the sample platform, getting ready to slide in the monitor shell. Will it fit?
Image

Success! It was a near perfect fit!

Next up is getting some clear acrylic which we will use to make our own custom fishtank! Will post more pics later as we make more progress.

Any comments or suggestions are welcome. We have been thinking about this project for the better part of 6 months now and are finally getting started on making some real progress!
Justin West
Server Admin & Forum Moderator
Follow me on Twitter | Find us on Facebook
User avatar
infinitevalence
Legit Extremist
Legit Extremist
Posts: 2841
Joined: Sat Apr 24, 2004 12:40 pm
Location: Nashville, TN
Contact:

Post by infinitevalence »

awwsome, how did you get the old screen out with out killing any one? and how did you dispose of it?
"Don't open that! It's an alien planet! Is there air? You don't know!"
User avatar
Illuminati
Site Admin
Site Admin
Posts: 2378
Joined: Mon Oct 06, 2003 8:48 am
Location: Wright City, Missouri, USA
Contact:

Post by Illuminati »

The screen is all part of the tube... we put it in a random dumpster at an undisclosed location. 8)
Justin West
Server Admin & Forum Moderator
Follow me on Twitter | Find us on Facebook
User avatar
Amy
Legit Extremist
Legit Extremist
Posts: 1571
Joined: Thu Dec 11, 2003 9:46 pm
Location: Wright City, Missouri
Contact:

Post by Amy »

Yeah, I have heard since we dumped it in a random trashcan that you are supposed to dispose of it "properly," but I still don't know what that means...Oh, well...We got rid of it a while back...
User avatar
Illuminati
Site Admin
Site Admin
Posts: 2378
Joined: Mon Oct 06, 2003 8:48 am
Location: Wright City, Missouri, USA
Contact:

Post by Illuminati »

Well, we accomplished a little more today!

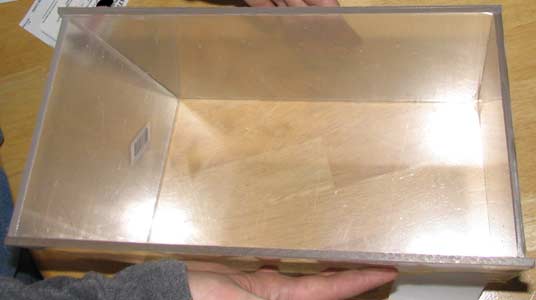
Image

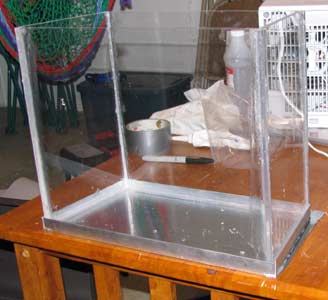
Yesterday we purchased the 30"x36" sheet of clear acrylic and had Home Depot cut it for us. Above is a shot of what it will look like. Notice the slight trapezoidal shape to the tank so the tank can fit properly in the monitor.

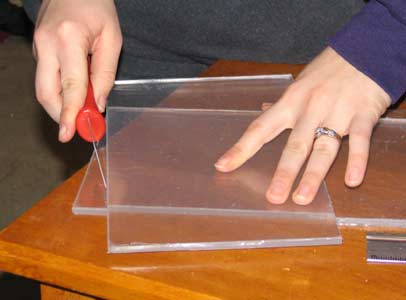
Image

Since Home Depot could only do 90 degree angle cuts, today we had to score and snap the acrylic ourselves to get the trapezoidal shape.

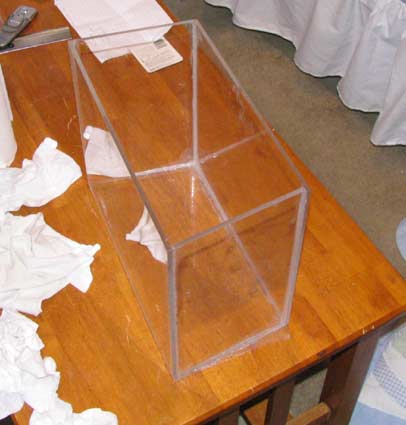
Image

Also, since the sealant has to sit for 7 days to reach maximum strength, we also took the time to make the tank!

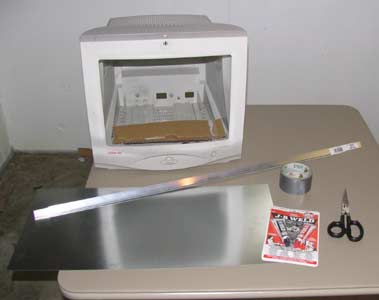
Image

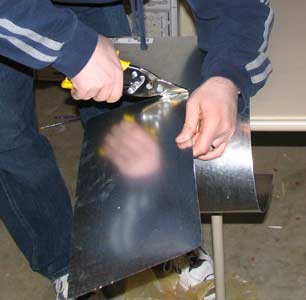
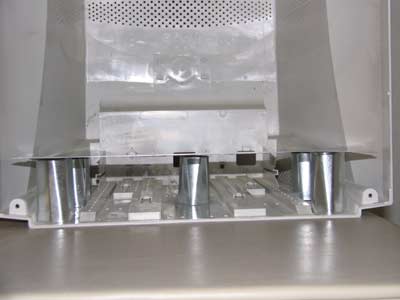
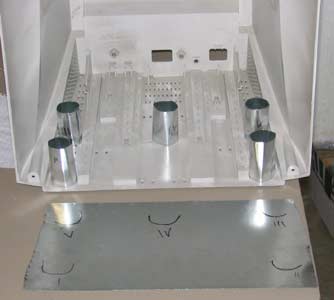
The next step is to make the shelf that the tank will sit on. it will have to be sturdy to hold the near 40lbs of water-weight, so we are going to rely on a self-built metal shelf for the tank to sit on.
Justin West
Server Admin & Forum Moderator
Follow me on Twitter | Find us on Facebook
User avatar
Apoptosis
Site Admin
Site Admin
Posts: 33941
Joined: Sun Oct 05, 2003 8:45 pm
Location: St. Louis, Missouri
Contact:

Post by Apoptosis »

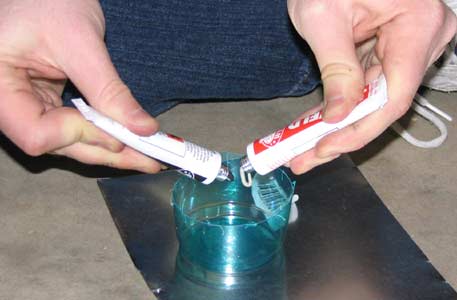
You guys are really flying on that project! The last picture with the JB Weld and duct tape leaves me wanting to see what that shelf is going to look like! How did you figure out the 40lb water weight? I wanna see the math behind that one!
User avatar
Illuminati
Site Admin
Site Admin
Posts: 2378
Joined: Mon Oct 06, 2003 8:48 am
Location: Wright City, Missouri, USA
Contact:

Post by Illuminati »

Math:

Area of a trapezoid: ((a+b)/2)*h where a and b are the top and bottom of a trapezoid, and h is height. For us: ((12.25 + 13.75)/2)*6.75 = 96.0625 square inches

Volume of our tank: Area of trapezoid * height of tank. For us: 96.0625 * 11 = 1080.703125 cubic inches.

Cubic Inches into Gallons: there are 231 cubic inches in one US Gallon. For us, there are 4.678 US gallons (not counting the width of the glass) in our tank.

Gallons into pounds: there are 8.33 pounds (lbs) in one US gallon. For us, 4.678 * 8.33 = 38.98 lbs of water. But like I said, its not quite this much in just water, because these measurements are based on including the 3/16" acrylic we used.
Justin West
Server Admin & Forum Moderator
Follow me on Twitter | Find us on Facebook
User avatar
Amy
Legit Extremist
Legit Extremist
Posts: 1571
Joined: Thu Dec 11, 2003 9:46 pm
Location: Wright City, Missouri
Contact:

Post by Amy »

The shelf if basically going to frame the bottom of the tank. Not sure why the duct tape is in the picture, but we are going to use the JB Weld instead of rivets or something to hold the shelf together. We are also going to put something in the bottom of the shell for the shelf to slide on so it's supported from underneath. We will always siphon out quite a bit of the water before sliding the aquarium out.
deadly-app
Legit Extremist
Legit Extremist
Posts: 307
Joined: Fri May 07, 2004 3:23 pm

Post by deadly-app »

This looks crazy! I hope it turns out well for you.

Is it a curved front? I cant tell from the pictures...
User avatar
gvblake22
Legit Extremist
Legit Extremist
Posts: 1111
Joined: Thu Feb 17, 2005 9:39 am
Location: Northern Michigan
Contact:

Post by gvblake22 »

VERY creative! What's the update on this mod??
MORE PICS!!! :mrgreen:
User avatar
Amy
Legit Extremist
Legit Extremist
Posts: 1571
Joined: Thu Dec 11, 2003 9:46 pm
Location: Wright City, Missouri
Contact:

Post by Amy »

The front is not curved, we felt that would be WAY too complicated for our first project. Yes, there will have to be a little bit of a gap on the edges because of this. Ideally, it would have been a flat screen monitor, but since that's not the case...

I would also like to add that, unlike what the email said, Justin AND Amy are working on this project . . .hehehe

Tomorrow we hope to start building the shelf. We discussed the exact layout, and we think we are going to make it so the tank will slide in and out while the shelf stays put. We are going to support the shelf on the bottom with cylinders made out of the sheet metal. Hopefully we'll have more pictures tomorrow night!
deadly-app
Legit Extremist
Legit Extremist
Posts: 307
Joined: Fri May 07, 2004 3:23 pm

Post by deadly-app »

Heh yes, curving would be extremely difficult to fit perfectly, but with patience it could be done :P
User avatar
Amy
Legit Extremist
Legit Extremist
Posts: 1571
Joined: Thu Dec 11, 2003 9:46 pm
Location: Wright City, Missouri
Contact:

Post by Amy »

To be honest, I wouldn't know where to find curved acrylic or how to curve it. . . do you?
deadly-app
Legit Extremist
Legit Extremist
Posts: 307
Joined: Fri May 07, 2004 3:23 pm

Post by deadly-app »

you would take the acrylic and clamp it to the monitor frame on one side, then using a heatgun you would heat the acrylic fairly evenly until it hit bendable temperature then clamp it on the opposite side. Lots of people do it on a smaller scale, IE curved bezels and such.
User avatar
Amy
Legit Extremist
Legit Extremist
Posts: 1571
Joined: Thu Dec 11, 2003 9:46 pm
Location: Wright City, Missouri
Contact:

Post by Amy »

Ahhh...okay...That makes sense. Sounds difficult, though. We set the tank inside the monitor last night to see what it looks like, and it looks okay, even with the gaps. They are barely noticeable. Hopefully tonight we'll get more done and have more pictures!
User avatar
Illuminati
Site Admin
Site Admin
Posts: 2378
Joined: Mon Oct 06, 2003 8:48 am
Location: Wright City, Missouri, USA
Contact:

Post by Illuminati »

Picture Update!

I'm just gunna list the pics in as much of a chronological order as I can... these pics all happened tonight.... and I discovered some bummer news about the tank tonight as well... see below.

Image
Image
Image
Image
Image
Image
Image

Yes, we staged the shot of the cat... :mrgreen:

The bummer news is that we discovered that the bottom of the tank shifted while we were glueing it, or while it was drying, so we will have to scrape the glue off with a utility knife or a razor blade, and re-seal the bottom panel of the tank... glad we noticed it now, instead of when we thought we were finished.

Last night, Amy got online and ordered the air pump, filter, and a cool bubble disk that will sit in the middle of the tank... while I was in charge of ordering 3 cold cathode lights to mount around the tank. :)

'Til next time...
Justin West
Server Admin & Forum Moderator
Follow me on Twitter | Find us on Facebook
User avatar
Illuminati
Site Admin
Site Admin
Posts: 2378
Joined: Mon Oct 06, 2003 8:48 am
Location: Wright City, Missouri, USA
Contact:

Post by Illuminati »

Just want to let everyone know that we got the bottom sealed back to the tank today. So the 7-day wait for water begins again. But we have a few things to work on before we're ready for water anyway. So this weekend be on the lookout for more pics while we figure out how the air pump, power supply and lighting are going to secured in this monitor housing.
Justin West
Server Admin & Forum Moderator
Follow me on Twitter | Find us on Facebook
User avatar
Illuminati
Site Admin
Site Admin
Posts: 2378
Joined: Mon Oct 06, 2003 8:48 am
Location: Wright City, Missouri, USA
Contact:

Post by Illuminati »

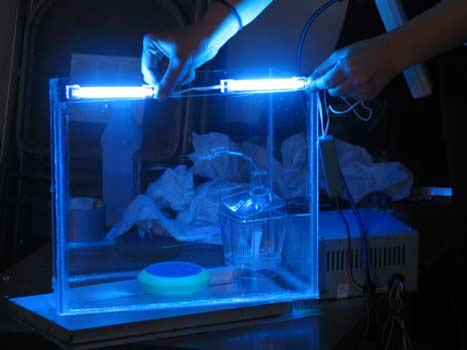
Amy and I ended up spending a lot of the nice day outside cleaning our cars... so we didn't get much done, but I do have a nice pic for ya. We got the PSU working and connected a couple of lights to get an idea of how 2 cold-cathode tube lights would look lighting the tank from above.

Image

Its very possible we'll have a few more pics for everyone tomorrow.
Justin West
Server Admin & Forum Moderator
Follow me on Twitter | Find us on Facebook
User avatar
Illuminati
Site Admin
Site Admin
Posts: 2378
Joined: Mon Oct 06, 2003 8:48 am
Location: Wright City, Missouri, USA
Contact:

Post by Illuminati »

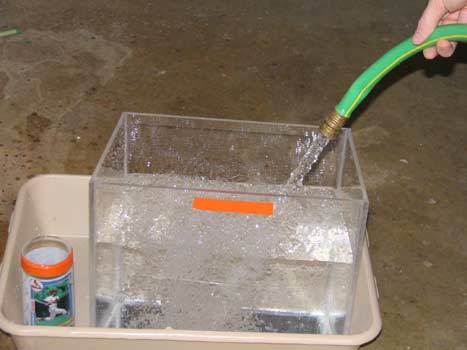
This morning Amy and I added water to our tank for the first time to check for any possible leaks.

Image

The orange electrical tape on the glass and tank represent the water level right after we filled it. And the glass is there to show an account for evaporation being the result for water loss. Hopefully the tank and glass loose water at the same rate. :)

Image

We should be cutting a hole in the top of the tank for access to feed the fish and for adding/removing water. More pics soon, I hope.
Justin West
Server Admin & Forum Moderator
Follow me on Twitter | Find us on Facebook
User avatar
Amy
Legit Extremist
Legit Extremist
Posts: 1571
Joined: Thu Dec 11, 2003 9:46 pm
Location: Wright City, Missouri
Contact:

Post by Amy »

Unfortunately, we have already discovered the "glass" idea won't be as accurate as we had anticipated. My wonderful cat has already decided that the water in that glass is better than what is in his water dish, so now the water level is somewhat less than the orange tape. Oh, well... So far, no leaks! We're going to wait until probably tomorrow night or Monday to determine for sure if there is any seepage.
Post Reply