Page 1 of 5
WARMACHINE 1.5 Build Phase
Posted: Thu Nov 20, 2008 3:18 pm
by Skippman
Well, I now have all the parts to commence construction of my new water cooled machine. Over the next couple of days I hope to get this thing online and running. Since my other thread was about the designing and parts of the machine this one will be focused on the building of the machine. A quick parts list.
CASE AND COOLING
Antec 1200 Case
NZXT Sentry LX Fan Controller
5 x Yate Loon 120mm High Speed Fans
Swiftech MCR320-QP Tripple Radiator
Swiftech Apogee GTZ CPU Waterblock
Swiftech MCP-655 Pump
Feser One F1 Coolent
Artic Silver Thermal Paste
10' Tygon Tubing (1/2" ID, 11/16" OD)
6 x Worm Gear Clamps
COMPUTER PARTS
Asus P5W DH Crossfire Supporting Motherboard
Intel Core2Duo E6600
2 X
4 Gig DD2-800 OCZ Fatality Edition RAM sets
2 X
PowerColor PCS+ HD4870 1GB GDDR5 GPU
2 X
Wester Digital Caviar Black 640GB WD6401AALS Drive in RAID 0
Lite OnLH-20A1L05 SATA DVD-R/W
Corsair HX620 Modular Power Supply
I/O
Dell 2405FPW 24" LCD Monitor/USB Hub
Logitech G-15 (1st Gen) Keyboard
Logitech MX Revolution Mouse
Creative Labs 5.1 Surround Sound Speaker Set
Misc
4 x UV/Black Lite Cold Cathode Tube Lights
Wire Loom
UV Reactive locking SATA cables, Blue
Wire ladders
Wire Locks
Wire Loom
Angle brackets, screws, lock washers, and washers from local hardware store (thanks TJHarlow)
Re: WARMACHINE 1.5 Build Phase
Posted: Thu Nov 20, 2008 3:23 pm
by Skippman
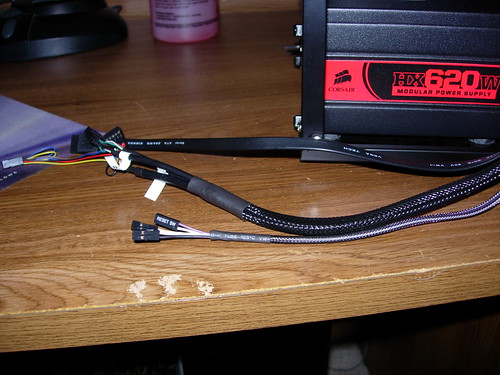
The first step I've taken thus far is to wire loom up the fan and power leads from the Sentry unit. You can see
how I did that at the other thread. The results look like this.
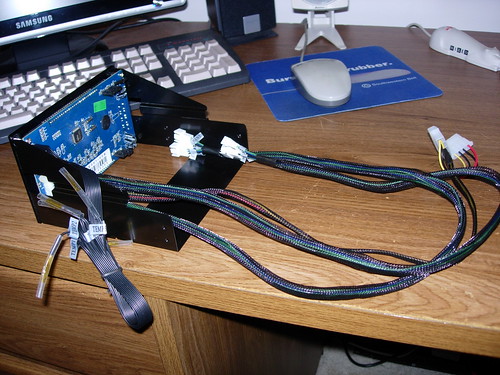
I've also assembled the mounting brackets for the tripple rad according to directions by tjharlow on YouTube who mounted a double radiator in his 1200. Here's a picture of it before installation.
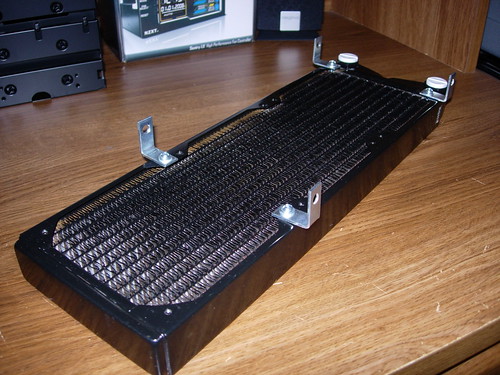
The brackets are standard 1" zinc coated angle brackets from my local hardware store. I've affixed them using washer and lock washers to ensure they won't come loose once mounted.
Re: WARMACHINE 1.5 Build Phase
Posted: Thu Nov 20, 2008 7:27 pm
by DaIceMan
looking good so far...
Re: WARMACHINE 1.5 Build Phase
Posted: Thu Nov 20, 2008 8:30 pm
by Skippman
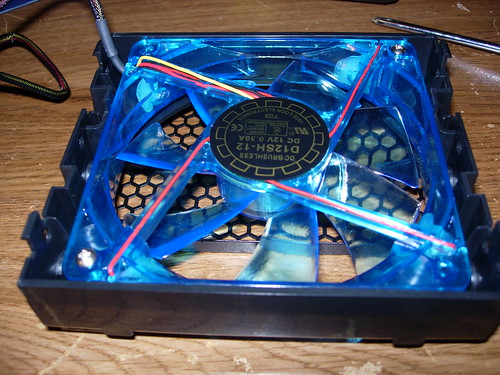
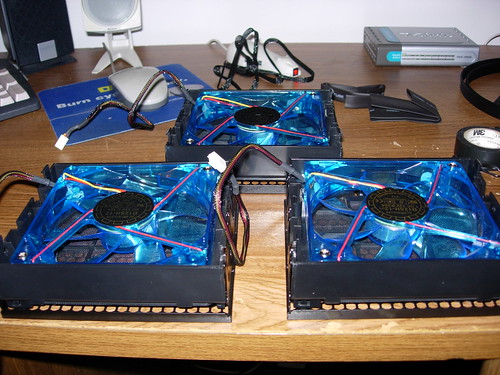
Ok, I took some time tonight to get the new Yate Loon's installed in the machine. I have to hand it to
Performance PCS as they did an excellent job sleaving the wiring.
I started by removing all 3 front fans from thier shrouds.
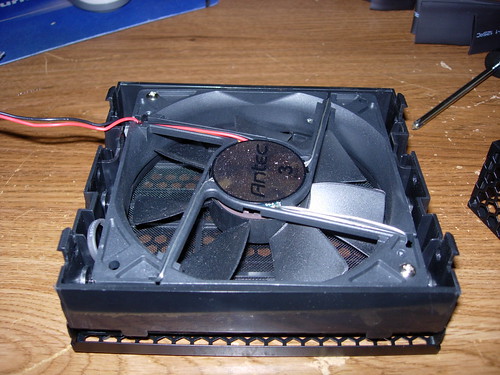
These fans had thier own speed control reostats which may have interfeared with the fan controllers ability to adjust thier speed. I removed the fan and the control knob from the housing. Fortunatly the knob fit right through the drive plate without Antec having to modify it resulting in a factory look even with the knob removed. I then took to installing the Yate Loons in thier new homes.
I then moved onto the rear case fans. The previous owner who I bought the case from had taped up the cables to keep them out of the way requiring me to remove the tape. I was concerned that the rear fan controller might be soldered in place but I was once again suprised and please to see Antec did not take the cheap way out as the rear speed switches were just as modular as the fronts.
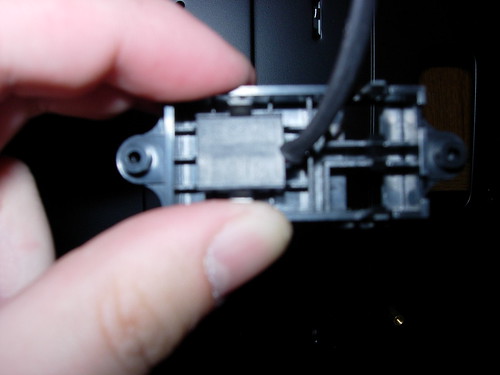
I know the image isn't very good but you'll notice that the speed controllers are only held in by two plastic clips. Popping the clips the controls came right out. I removed the controllers for the two rear fans and left the controller in place for the big daddy fan on top of the case. I then mounted the new fans in place.
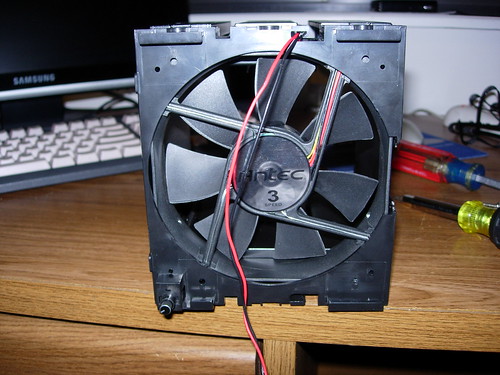
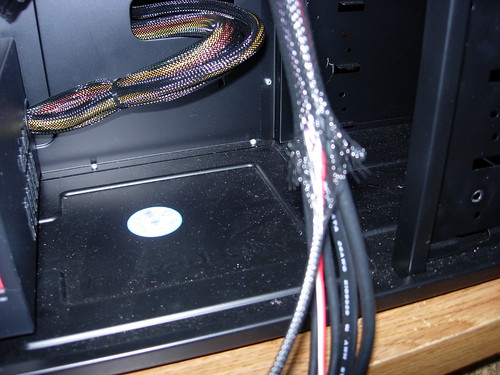
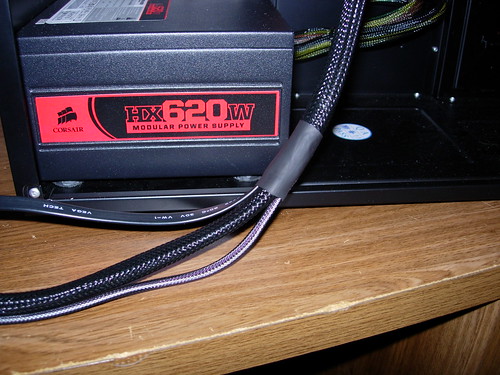
I now find myself with 5 left over 120mm fans. I decided to put one of them to use in cooling my power supply by mouting it to the rear of the hard drive rack. The mount had a bracket to retain the controller nob that the front fans used so I made sure to use one of those for this purpose.
So now I have all 5/6 fans installed in the case. I've cleaned up the wiring a bit to keep it out of the way and make everything look nice. I also tested (before installation) that the fans would work with the Sentry. I'm pleased to report this time I'm getting a proper RPM read out and that I can control each fans speeds independently. More to come!
Re: WARMACHINE 1.5 Build Phase
Posted: Thu Nov 20, 2008 8:37 pm
by Alathald
Dude, I'm so jealous! It's starting to really come together...I'm hoping to get a bit more done on mine this weekend but I won't be getting the components for awhile still

Let us know how the Yate Loons perform sound wise! I'm thinking of getting some plain jane ones myself...
Re: WARMACHINE 1.5 Build Phase
Posted: Thu Nov 20, 2008 9:14 pm
by martini161
do it, you wont be dissapointed
Re: WARMACHINE 1.5 Build Phase
Posted: Thu Nov 20, 2008 9:38 pm
by Skippman
Alathald wrote:Dude, I'm so jealous! It's starting to really come together...I'm hoping to get a bit more done on mine this weekend but I won't be getting the components for awhile still
Let us know how the Yate Loons perform sound wise! I'm thinking of getting some plain jane ones myself...
Thanks bro!
When I spun them up to test the Sentry they didn't seem any louder than any other fan I'd used before. Now mind you the Sentry was showing the max RPM at 1800. I don't know if that's a limitation on the controller or possibly a misreport as the fans themselves are supposed to be capable of 2200RPM. I have to admit that I'm glad I sprung for them. They're quality, they light up nicely, and they push some serious air. Maybe since I've never used fans this large in a build before I'm just used to the 80mm whine.
The sleeving job done by Performace PCS is great. I've bought several things from them for this project and have been happy with every one of them. What's nice is they have like 4 diffrent cable options including leaving both 4 and 3 pin connectors, just the 3 pin, sleeved or non sleeved. I went with just the 3 pin as I knew I was going to use the controller and it was the second cheapest option. This saves me the hastle of having to do all that myself and didn't cost that much extra, like a dollar a fan I think.
Re: WARMACHINE 1.5 Build Phase
Posted: Thu Nov 20, 2008 10:28 pm
by Sporg
Looking good! Thanks for the updates and pics.
Re: WARMACHINE 1.5 Build Phase
Posted: Thu Nov 20, 2008 10:57 pm
by Bio-Hazard
Nice going so far, can't wait till you get into the water cooling part of things.............

Re: WARMACHINE 1.5 Build Phase
Posted: Fri Nov 21, 2008 4:41 pm
by Skippman
Didn't have much time to work on my puter today as I spent the day installing 5 in ceiling KEF speakers in my bedroom theater project. I did get some serious wire looming done. I started by looking at the motherboard to see what connectors go where. I broke those cables up into groups, once for HD/PWR/RST, one for USB/AC97, and one for the ESATA port on the front of the case.
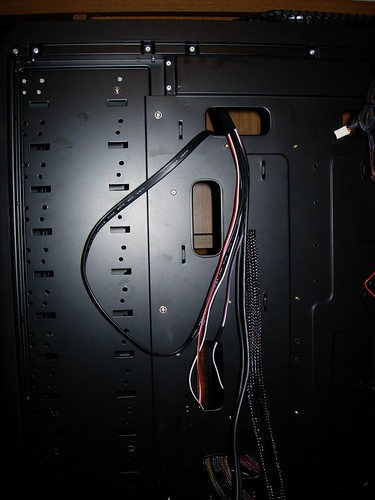
I used a large braided wire loom for the whole bundle leaving myself aobut 6" of cable on each group.
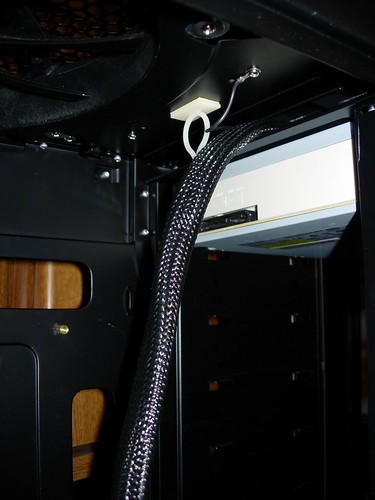

Then I loomed each group seperately.
I used electrical tape to bind up the end of the bundles that would be hidden by the larger loom then used a large peice of heat shrink to give it a finished look.
I then heat shrunk the end of each of the smaller groups.
I think I'm offically qualifed to say I'm now an expert at wire looming.

It was a lot of work and messy. But I think the final product gives the new machine a more polished look. I need to figure out how to get the white purse clasp style cable holder off the inside top of the case so I can replace it with one of the nicer black ones I've bought.
Re: WARMACHINE 1.5 Build Phase
Posted: Fri Nov 21, 2008 5:39 pm
by DMB2000uk
It's looking great so far, the amount of effort you are putting in means it's surely going to look great once finished

And as for getting that sticky hook thing off, just yank it off, and then clean up the sticky stuff with rubbing alcohol or something that will dissolve the sticky stuff left on.
Dan
Re: WARMACHINE 1.5 Build Phase
Posted: Fri Nov 21, 2008 11:55 pm
by Bio-Hazard
WD40 works wonders at getting that left over sticky crap off after you yank the white clip off.
Re: WARMACHINE 1.5 Build Phase
Posted: Sat Nov 22, 2008 10:51 am
by martini161
ive had luck with white lithium too
Re: WARMACHINE 1.5 Build Phase
Posted: Sat Nov 22, 2008 12:51 pm
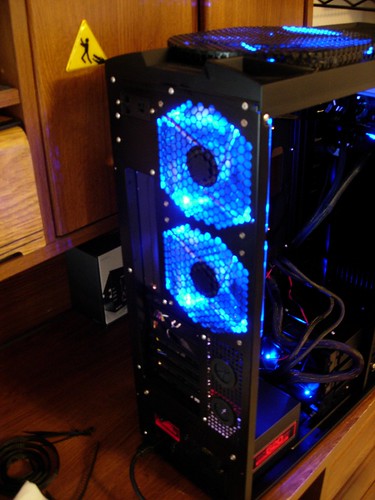
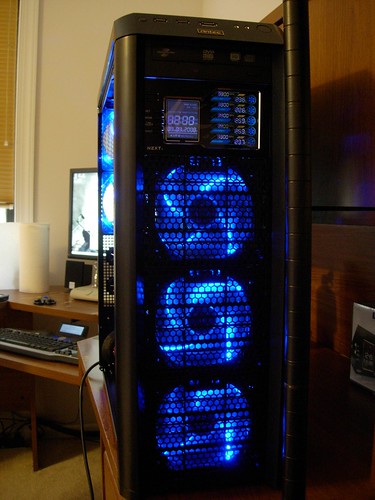
by Skippman
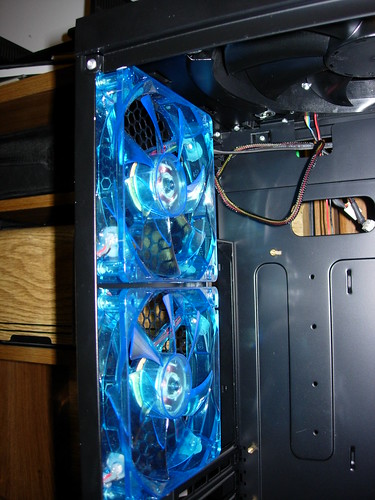
Bought some Goo Gone and it took most of it off. I just put the black wire clamp over top of it. I also mocked up the fan contoller, radiator, and fans to see if there was plenty of air flow and to make sure everything was working correctly. Here's a couple pictures.
Re: WARMACHINE 1.5 Build Phase
Posted: Sat Nov 22, 2008 1:46 pm
by Sporg
That looks badass!!!
Re: WARMACHINE 1.5 Build Phase
Posted: Sat Nov 22, 2008 4:09 pm
by Bio-Hazard
Looking good......................;)
Re: WARMACHINE 1.5 Build Phase
Posted: Sat Nov 22, 2008 9:07 pm
by Alathald
Wow looking awesome! I love the fan controller, really looks good. Only thing that would top it off would be to stealth the DVD drive
I worked on mine a bit yesterday and have decided to get a custom faceplate lasercut or something...this dremel is too much work and won't look as good in the end. Now I just got to find a way to get it done cheap...

PS - Sorry for hijacking your thread (again)

Re: WARMACHINE 1.5 Build Phase
Posted: Sat Nov 22, 2008 9:49 pm
by martini161
Alathald wrote:Wow looking awesome! I love the fan controller, really looks good. Only thing that would top it off would be to stealth the DVD drive
I worked on mine a bit yesterday and have decided to get a custom faceplate lasercut or something...this dremel is too much work and won't look as good in the end. Now I just got to find a way to get it done cheap...
PS - Sorry for hijacking your thread (again)
i really cant believe your going to waste money on a laser cut bezel for that POS case...
Re: WARMACHINE 1.5 Build Phase
Posted: Sun Nov 23, 2008 8:37 am
by Skippman
Alathald wrote:Wow looking awesome! I love the fan controller, really looks good. Only thing that would top it off would be to stealth the DVD drive
I worked on mine a bit yesterday and have decided to get a custom faceplate lasercut or something...this dremel is too much work and won't look as good in the end. Now I just got to find a way to get it done cheap...
PS - Sorry for hijacking your thread (again)
It's almost impossible to see the DVD drive when the PC's sitting on the floor as the lip on the top of the case hides it nicely. I just wish it didn't have all that rubbish writing on the face of it.
Speaking of dremels. I'm going to have to cut the support brace off the back of the NZXT's mouting bracket in order to make the water cooling tubes fit without kinking them. Sucks, but you gotta do what you gotta do. Take that manufacturers warrenty!
As for cutting your case, why laser? Have you considered water jet cutting? There's a place in STL that's supposed to be fairly reasonable. I considered having WARMACHINE cut into the side of the case panel vertically where the drive stack is and back covering it with lexan and blue CCT's but decided rather than being cool it'd be cheezy.
Re: WARMACHINE 1.5 Build Phase
Posted: Sun Nov 23, 2008 9:25 am
by Alathald
Skippman wrote:It's almost impossible to see the DVD drive when the PC's sitting on the floor as the lip on the top of the case hides it nicely. I just wish it didn't have all that rubbish writing on the face of it.
Could try a stealth mod like
this one...seems simple enough, just need some double-sided tape. Might even be a good spot for you to etch WARMACHINE into the case.
As far as dremeling off case bits, pick up some proper metal cutting bits, they cut a lot better and last a lot longer than grinding wheels
Skippman wrote:As for cutting your case, why laser? Have you considered water jet cutting? There's a place in STL that's supposed to be fairly reasonable. I considered having WARMACHINE cut into the side of the case panel vertically where the drive stack is and back covering it with lexan and blue CCT's but decided rather than being cool it'd be cheezy.
Yeah, that's why I included the 'or something' caveat
I've never had something like that done so I don't even know where to start. I'll look into CNC and water jet cutting as well, just trying to figure out the cheapest way to have it done. Thanks for the suggestion!