
If not you have an excuse for a new boardDMB2000uk wrote:Now I have to wait until I've reassembled everything to see if my motherboard still works!
Project P182 Watercooled V2!
Re: Motherboard Nip & Tuck
"The democracy will cease to exist when you take away from those who are willing to work and give to those who would not."
-Thomas Jefferson
-Thomas Jefferson
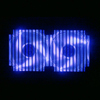
Lighting Teaser
I'm so close now, but there's still loads to do.
I soldered/wired up 2/3 of the LEDs last night....

Man this thing's going to look pretty.
I soldered/wired up 2/3 of the LEDs last night....
Man this thing's going to look pretty.
 (<- Clickable)
Sleeving Woes
So I don't think I mentioned yet that when I got my Seasonic PSU back from RMA, they had replaced it with a newer version of the X-Series lineup, which has completely different modular connectors for all the cables.
Which meant all my sleeving done so far was useless with this PSU.
I've been able to re-sleeve the 8pin and PCIe cables again, so am back to where I was before my PSU setback, but now need to order a bunch more paracord, and my supplier is out of stock of the silver colour (for another 4 weeks).
In a tiny bit of positive news, I'm really proud of this custom FDD modular power cable I made:

I was able to use my new toy's hot-knife attachment to melt the insides of the connectors out a bit, allowing me to tuck the heatshrink into the connector for a no-wires-visible finish.
But I'm dreading working on this nightmare:

I've already re-wired the cables so they don't cross over each other to the PSU-split connector (as much as I can), but there are 4 two-wires-on-one-pin connectors on the motherboard side which I'm going to have to find a way of hiding or cleanly sleeving, and yes, that is a wire pair twisted together for some inexplicable reason.
Which meant all my sleeving done so far was useless with this PSU.
I've been able to re-sleeve the 8pin and PCIe cables again, so am back to where I was before my PSU setback, but now need to order a bunch more paracord, and my supplier is out of stock of the silver colour (for another 4 weeks).
In a tiny bit of positive news, I'm really proud of this custom FDD modular power cable I made:
I was able to use my new toy's hot-knife attachment to melt the insides of the connectors out a bit, allowing me to tuck the heatshrink into the connector for a no-wires-visible finish.
But I'm dreading working on this nightmare:
I've already re-wired the cables so they don't cross over each other to the PSU-split connector (as much as I can), but there are 4 two-wires-on-one-pin connectors on the motherboard side which I'm going to have to find a way of hiding or cleanly sleeving, and yes, that is a wire pair twisted together for some inexplicable reason.
(<- Clickable)Sleeving... Done!
I was finally was able to finish my sleeving yesterday. :D
Had an amazingly timed postal delivery a few days ago too, I had literally just run out of paracord when the postman knocked on the door bringing me my ordered resupply!
The nightmare of a 24pin cable came out like this:

While I'm not able to get straight cables all the way down (due to the cables crossing towards the PSU side), I'll at least be able to get the motherboard side looking clean.
Rather than try and run two sleeved cables from one pin (like I had done on the PCIe PSU connectors), to keep it looking clean on the motherboard side I chose to sleeve the two wires as one, and then split them out with some heat shrink hiding the join near the PSU side:

Whatever I did here I'd have had to have a join somewhere on the cable, and this way saved me having to break out my soldering iron.
I took back everything I said about the 24 pin cable being a nightmare when it was time to do the SATA power cable though, how have I not come across people bitching about sleeving them before?!

It's not 100% perfect, but I'm sick of messing with this cable, so it's close enough!
Had an amazingly timed postal delivery a few days ago too, I had literally just run out of paracord when the postman knocked on the door bringing me my ordered resupply!
The nightmare of a 24pin cable came out like this:
While I'm not able to get straight cables all the way down (due to the cables crossing towards the PSU side), I'll at least be able to get the motherboard side looking clean.
Rather than try and run two sleeved cables from one pin (like I had done on the PCIe PSU connectors), to keep it looking clean on the motherboard side I chose to sleeve the two wires as one, and then split them out with some heat shrink hiding the join near the PSU side:
Whatever I did here I'd have had to have a join somewhere on the cable, and this way saved me having to break out my soldering iron.
I took back everything I said about the 24 pin cable being a nightmare when it was time to do the SATA power cable though, how have I not come across people bitching about sleeving them before?!
It's not 100% perfect, but I'm sick of messing with this cable, so it's close enough!
(<- Clickable)Dye Tubing, Dye!
I'm so close to finishing this build now, but have agonisingly little time to work on it this week!
I was finally was able to get all my fittings installed (after getting the last two in the post on Saturday) and so got around to cutting the tubing to its needed lengths.

But plain tubing isn't good enough for this time round, so lets try a little magic

Rit fabric dye apparently works really well on tubing, and not being able to find any tubes in a deep 'blood-red' colour, I had to give it a go.
Needless to say, I'm really pleased with the results...


Now to wait a week before I can re-assemble everything and take some nice photos
I was finally was able to get all my fittings installed (after getting the last two in the post on Saturday) and so got around to cutting the tubing to its needed lengths.
But plain tubing isn't good enough for this time round, so lets try a little magic
Rit fabric dye apparently works really well on tubing, and not being able to find any tubes in a deep 'blood-red' colour, I had to give it a go.
Needless to say, I'm really pleased with the results...
Now to wait a week before I can re-assemble everything and take some nice photos
(<- Clickable)
Re: Project P182 Watercooled V2!
That coloring looks awesome! can't wait to see it pumping
-Austin

Screamin' BCLK:
775 System (Overclocking Platform): Q8400/Q8300/E8400/E7400/E7500 - GA-EP45-UD3R v1.1 - 4GB (2x2) OCZ Reaper HPC DDR2 1066 CL5 2.1v Corsair TX-750w
Gamer: Asrock Z77 Extreme4, i7 3770K @4.6GHz, ThermalTake Armor A90 modded, 2x4GB GSKILL RipjawsX DDR3 2133 CL9, Corsair HX-750w, MSI GTX660 Twin Frozr
Server2012: Q9300 - 8GB DDR2 - Asus P5QL Pro - Corsair CX430 - Mirrored 2TB Seagate's with 2TB WD cav for fileshare backups, 1TB WD for OS backups
Re: Project P182 Watercooled V2!
That's what she saidskier wrote:That coloring looks awesome! can't wait to see it pumping
"The democracy will cease to exist when you take away from those who are willing to work and give to those who would not."
-Thomas Jefferson
-Thomas Jefferson
Penultimate Painting
Stay tuned for final project photos, this is the last update before everything is done... ;)

(<- Clickable)


Re: Project P182 Watercooled V2!
Phenomenal! 
-Austin
Screamin' BCLK:
775 System (Overclocking Platform): Q8400/Q8300/E8400/E7400/E7500 - GA-EP45-UD3R v1.1 - 4GB (2x2) OCZ Reaper HPC DDR2 1066 CL5 2.1v Corsair TX-750w
Gamer: Asrock Z77 Extreme4, i7 3770K @4.6GHz, ThermalTake Armor A90 modded, 2x4GB GSKILL RipjawsX DDR3 2133 CL9, Corsair HX-750w, MSI GTX660 Twin Frozr
Server2012: Q9300 - 8GB DDR2 - Asus P5QL Pro - Corsair CX430 - Mirrored 2TB Seagate's with 2TB WD cav for fileshare backups, 1TB WD for OS backups
-
DJ Tucker

- Legit Extremist

- Posts: 1502
- Joined: Tue Dec 30, 2008 11:52 am
- Location: Hardbase Headquaters
- Contact:
Re: Project P182 Watercooled V2!
that has to be the most cable tidy rig i have ever seen. not seen cables looking that tidy on the back of motherboard for a long long time, so congrats on that achievement. Unfortunatly my non modular psu is horrid for my new case. don't get me wrong i finally have 80% of my cables hidden behind the motherboard but will never get it to look like yours. jealous indeed 
MSI Z590 Gaming Edge Wifi
Core i7 10700KF 5Ghz @ 1.25v With Alphacool Eisblock XPX Aurora Edge
Gigabyte RTX 2080 Super 1980Mhz @ 0.925v With TechN GPU Block
32Gb Corsair Vengeance RGB Pro 3600Mhz 16-18-18-38
Aqua Computer Ultitube 200 Pro D5 Next
Corsair XR5 240mm x2 & 360mm
Intel 670p 2Tb & WD Blue M.2 2Tb
Corsair HX1000i
Philips Momentum 3000 24" (Main) & MSI Optix G241V E2 (Second)
Lian Li O11D
Roccat Vulcan 120 Aimo, Roccat Kone Aimo Remastered and Roccat Sym Pro Air
Re: Project P182 Watercooled V2!
Thanks :Dskier wrote:Phenomenal!
Worst part is, I feel like the cable bunches at the back of the case should be tidier >_>DJ Tucker wrote:that has to be the most cable tidy rig i have ever seen. not seen cables looking that tidy on the back of motherboard for a long long time, so congrats on that achievement. Unfortunatly my non modular psu is horrid for my new case. don't get me wrong i finally have 80% of my cables hidden behind the motherboard but will never get it to look like yours. jealous indeed
I am proud however of how well I was able to hide the LED wires, they're pretty much invisible on all the photographs!
(<- Clickable)
Re: Project P182 Watercooled V2!
Realy neat setup! Congrats! Is it ready yet?
There should be a completely see-through sidepanel on both sides to show-off all this
There should be a completely see-through sidepanel on both sides to show-off all this
Main rig: NZXT Phantom modded case with Danger Den WC, Gigabyte B550 Aorus Elite, Ryzen 5800X @ stock, 32GB Patriot Viper DDR4 3200Mhz 16-18-18-36-1T, AMD RX 5700XT + AlphaCool WC, ACER Nitro XV2 27", SP 1TB nvme PCiE GEN3, Samsung 2TB; Cooler Master MW Gold 650W, Win10 Pro 64
my complete GFX tuneup & cooling mod: http://forums.legitreviews.com/viewtopi ... highlight=
my complete GFX tuneup & cooling mod: http://forums.legitreviews.com/viewtopi ... highlight=
-
Sporg

- Legit Extremist
- Posts: 1200
- Joined: Mon Dec 11, 2006 10:22 am
- Location: Kansas City Area
- Contact:
Re: Project P182 Watercooled V2!
Haven't been on in forever and come back to find this! Freaking awesome, Dan!
I would never die for my beliefs because I might be wrong.
~Bertrand Russell
~Bertrand Russell
The Recent Heatwave Was A Convenient Excuse...
So you know how you never really finish a mod...

(<- Clickable)-
InspectahACE

- Legit Extremist
- Posts: 1776
- Joined: Tue Sep 06, 2005 8:25 pm
- Location: Las Vegas
Re: Project P182 Watercooled V2!
Simply gorgeous work on this Dan.
i9-9900k | ASUS Maximus XI Hero | ASUS Strix RTX 2070 Super | 32GB G.Skill Trident RGB DDR4-3600 | Cooler Master ML360L AIO | Seagate Firecuda 510 1TB NVME SSD | Tt ToughPower RGB 850W PSU | Sound Blaster Z | LL PC-O11 Dynamic | ASUS Gladius II Mouse | ASUS Strix Scope RX| ASUS VG259QMM 24" 240hz monitor | Windows 11 Pro
Digital Calipers FTW!
The tollerances on fitting the Alphacool Nexxxos Monsta 420mm (3x140mm) in my case are going to be down to 0.5mm. Before I bought the radiator I had no way of knowing 100% if it was all going to fit.
I always said I liked a challenge though!
As there is quite literally no room to fit 140mm fans on my case configuration, I need a way to step down to 120mm fan fittings, and a new way to secure the it all to the case...
...and I need to do all that in under 2mm. >_<
Here's the beginnings of my solution:

Next up, I need to find a '120mm fan hole' sized hole saw, and borrow someone's bench press drill. :D
Not sure this will ever be 100% complete, but after this cooling upgrade (and hopefully case window take 2) there'll not be much left for me to mod that hasn't already been tweaked in some way! In fact, the only panels on the whole case I won't have cut anything out of after this will be the case roof and front door!
I always said I liked a challenge though!
As there is quite literally no room to fit 140mm fans on my case configuration, I need a way to step down to 120mm fan fittings, and a new way to secure the it all to the case...
...and I need to do all that in under 2mm. >_<
Here's the beginnings of my solution:
Next up, I need to find a '120mm fan hole' sized hole saw, and borrow someone's bench press drill. :D
InspectahACE wrote:Simply gorgeous work on this Dan.
Sporg wrote:Haven't been on in forever and come back to find this! Freaking awesome, Dan!
Thanks guys :Dsbohdan wrote:Realy neat setup! Congrats! Is it ready yet?
There should be a completely see-through sidepanel on both sides to show-off all this
Not sure this will ever be 100% complete, but after this cooling upgrade (and hopefully case window take 2) there'll not be much left for me to mod that hasn't already been tweaked in some way! In fact, the only panels on the whole case I won't have cut anything out of after this will be the case roof and front door!
(<- Clickable)-
DJ Tucker
- Legit Extremist
- Posts: 1502
- Joined: Tue Dec 30, 2008 11:52 am
- Location: Hardbase Headquaters
- Contact:
Re: Project P182 Watercooled V2!
this system looks amazing. can't wait to see the full rig up and running. however, that is going to be a tricky mod for your fans on that raditor. as long as you can get the parts you need you'll be fine. you've overcome all obstacles so far so congrats on that to
MSI Z590 Gaming Edge Wifi
Core i7 10700KF 5Ghz @ 1.25v With Alphacool Eisblock XPX Aurora Edge
Gigabyte RTX 2080 Super 1980Mhz @ 0.925v With TechN GPU Block
32Gb Corsair Vengeance RGB Pro 3600Mhz 16-18-18-38
Aqua Computer Ultitube 200 Pro D5 Next
Corsair XR5 240mm x2 & 360mm
Intel 670p 2Tb & WD Blue M.2 2Tb
Corsair HX1000i
Philips Momentum 3000 24" (Main) & MSI Optix G241V E2 (Second)
Lian Li O11D
Roccat Vulcan 120 Aimo, Roccat Kone Aimo Remastered and Roccat Sym Pro Air
Core i7 10700KF 5Ghz @ 1.25v With Alphacool Eisblock XPX Aurora Edge
Gigabyte RTX 2080 Super 1980Mhz @ 0.925v With TechN GPU Block
32Gb Corsair Vengeance RGB Pro 3600Mhz 16-18-18-38
Aqua Computer Ultitube 200 Pro D5 Next
Corsair XR5 240mm x2 & 360mm
Intel 670p 2Tb & WD Blue M.2 2Tb
Corsair HX1000i
Philips Momentum 3000 24" (Main) & MSI Optix G241V E2 (Second)
Lian Li O11D
Roccat Vulcan 120 Aimo, Roccat Kone Aimo Remastered and Roccat Sym Pro Air
The Slowest Modder In The World!
Next month marks the 5 year anniversary of this mod.
And it's still not finished. >_<
I'm going to try a little harder to make some time to finish it off, but I got engaged at the end of last year, and am currently neck deep wedding planning, so don't hold your breath.
---
Ok, first up, I've gotten hold of a second P182 to replace some choice parts from my original case. I want to clean up a lot of the cuts I originally made, and need to expand others in ways I couldn't do.
I'll get back to the radiator mount on my next update (ended up getting one laser cut out of steel).
First under the chopping block again is the motherboard tray. The old one had been through 3 motherboard revisions, so I had to expand the CPU cutout in an ugly way to still have access. Redoing this for my 4th motherboard for this mod so it'll be nice and clean again.


Compared to the mismatched angles on my last one, this should look a lot nicer:

---
Next up is something I'm going to let you guess at what I'm doing:


Can you tell what it is yet? ;)
And it's still not finished. >_<
I'm going to try a little harder to make some time to finish it off, but I got engaged at the end of last year, and am currently neck deep wedding planning, so don't hold your breath.
---
Ok, first up, I've gotten hold of a second P182 to replace some choice parts from my original case. I want to clean up a lot of the cuts I originally made, and need to expand others in ways I couldn't do.
I'll get back to the radiator mount on my next update (ended up getting one laser cut out of steel).
First under the chopping block again is the motherboard tray. The old one had been through 3 motherboard revisions, so I had to expand the CPU cutout in an ugly way to still have access. Redoing this for my 4th motherboard for this mod so it'll be nice and clean again.
Compared to the mismatched angles on my last one, this should look a lot nicer:
---
Next up is something I'm going to let you guess at what I'm doing:
Can you tell what it is yet? ;)
(<- Clickable)Re: Project P182 Watercooled V2!
Oops, realised I haven't updated this in a bit, so I'll drop in my current progress updates below!
(<- Clickable)