Page 1 of 2
watercooling prep
Posted: Wed Mar 11, 2009 3:09 pm
by stopthekilling77
Well i have my watercooling stuff in today, and I'm going to put it together as soon as i get my case mods finished. breaking out the dremel right now but I'm wondering what procedure i should follow when getting my WC all setup. flushing radiator? do i have to? how do i do it? etc etc
I've got the instructions that came with the Swiftech Apex Ultima kit but thats all...
Re: watercooling prep
Posted: Wed Mar 11, 2009 3:19 pm
by Skippman
Start by flushing the radiator. I used off the shelf bottled water for that (made sure to get reverse osmosis filtered water). You want to do that to remove any left over solder or other metal bits from the interior of the radiator before you install it. You know, grindy bits that might take out thier revenge on your pump.
Once that's done install the radiator into the case. Start doing your plumbing. If you have trouble putting on your hoses on the barbs a little vasoline helps as it's not water soluable, won't damage the hoses, and is virtually water proof. Bio taught me that trick. Make sure you put the hoses on all the way to the bottom of the barb! That's the biggest rookie mistake. Push it on until it actually hits whatever the barb is coming out of. Then put your clamps behind the barb. Make sure they're snug.
Last tip is to make sure you only run your pump for a few seconds at a time. Let it flush the coolent through then give it a chance to "burp" the air back out of the loop. If you leave it run, it'll cavitate and burn out the motor. A AT PSU is great for this as you can turn the pump on and off independent of the rest of the system. Plus once the loop is filled you can let the AT PSU run for 10 min or so without turning on your system to make sure that there's no leaking.
Re: watercooling prep
Posted: Wed Mar 11, 2009 3:50 pm
by Bio-Hazard
Couldn't have said it better myself...............

Re: watercooling prep
Posted: Wed Mar 11, 2009 4:21 pm
by stopthekilling77
great! thanks guys! i'm JUST getting to my measurements for my dremeling, guessing i won't have my machine finished til much later... Going to have lots of places to hide my wires, and open fan areas where metal mesh used to be. Off to get my motherboard tray cutout done!The more advice the better, but if thats all i need then i think i got it. when i'm flushing the radiator, just pour it through? and where did you find in specific reverse osmosis water?
Re: watercooling prep
Posted: Wed Mar 11, 2009 4:36 pm
by Skippman
Just pour it through. Pour one port full till it comes out the other. I laid the radiator flat and overfilled it to make sure I didn't leave any pockets in there. Then I shook it gently.
I got the water off the shelf at my local grocery store. If you read the bottles they tell you what process they use to purify it. Destilled water is great, but I couldn't find any specifically destilled water so I used reverse osmosis.
Another key piece of info is to make sure there's no kinks! Use some extra hose if you have to but no kinks/sharp bends.
Re: watercooling prep
Posted: Wed Mar 11, 2009 6:50 pm
by XstollieX
Hmm wish I would have thought about the Vaseline. Would have made assembly much easier. Thats a good tip for future builds.
Re: watercooling prep
Posted: Wed Mar 11, 2009 9:54 pm
by Bio-Hazard
I normally go the extra measure and open up the blocks to ensure that there isn't any leftover metal filings inside, but that's just me.
Re: watercooling prep
Posted: Wed Mar 11, 2009 10:11 pm
by stopthekilling77
Bio-Hazard wrote:I normally go the extra measure and open up the blocks to ensure that there isn't any leftover metal filings inside, but that's just me.
I'd probably put it back together wrong

Re: watercooling prep
Posted: Thu Mar 12, 2009 10:08 am
by XstollieX
Bio-Hazard wrote:I normally go the extra measure and open up the blocks to ensure that there isn't any leftover metal filings inside, but that's just me.
Ever find any big chunks?
Re: watercooling prep
Posted: Thu Mar 12, 2009 7:22 pm
by stopthekilling77
Well I've got good news and bad news. My case is fully modded and ready for my watercooling setup, but the mounting brackets for the MCW60-R gpu block don't fit. I've emailed Gabe @ Swiftech, but I'm still a bit tweaked about all this. Anyway here's some pics as I'm on "pause" until I get my part

Re: watercooling prep
Posted: Fri Mar 13, 2009 8:24 am
by Skippman
Nice cut job! Those wires are looking CLEAN!
As for Gabe, he's a great guy. Told him about a problem I had with my GTZ and he had a replacement part shipped out the same day. I'm confident he'll make it right. Just sucks to be mid project and have the whole thing come to a screeching halt. I had a similar problem with my setup but fortunatly Bio had replacement parts to make it work.
Re: watercooling prep
Posted: Fri Mar 13, 2009 11:01 am
by Bio-Hazard
Your MCW60 should be a direct bolt-on to your video card unless you're upgrading to a 200 Nvidia series, then you'll need Swifties GTX adapter.
Re: watercooling prep
Posted: Fri Mar 13, 2009 11:03 am
by Bio-Hazard
XstollieX wrote:Bio-Hazard wrote:I normally go the extra measure and open up the blocks to ensure that there isn't any leftover metal filings inside, but that's just me.
Ever find any big chunks?
Yup, sure did, back when they first changed manufacturers during the first runs of the Swiftech APOGEE blocks.
Re: watercooling prep
Posted: Fri Mar 13, 2009 11:10 am
by stopthekilling77
Bio-Hazard wrote:Your MCW60 should be a direct bolt-on to your video card unless you're upgrading to a 200 Nvidia series, then you'll need Swifties GTX adapter.
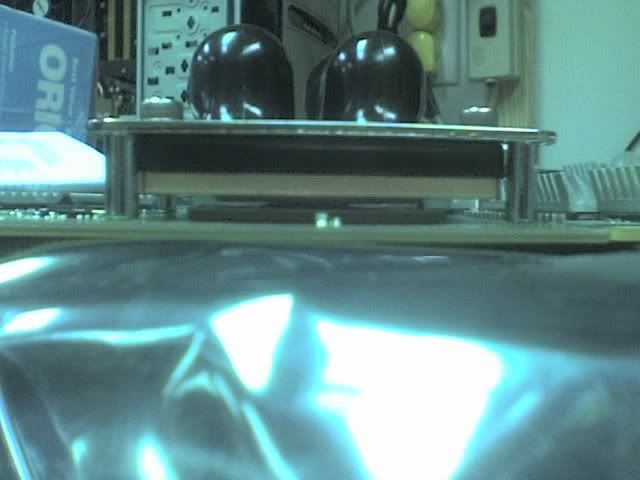
As you can see in this slightly fuzzy cell phone shot, the mounting sits directly on the card and yet theres still space between the GPU chip and the block...
Re: watercooling prep
Posted: Fri Mar 13, 2009 3:29 pm
by Bio-Hazard
That ain't good at all, must have been a bad batch of top brackets or something, have you heard back from Swiftech yet??
Re: watercooling prep
Posted: Fri Mar 13, 2009 4:41 pm
by stopthekilling77
Nope, I've been checking my email every few hours here at work, but no response yet.

I took the opportunity to take apart the waterblock and i'm glad i did, i found a bit of free copper hanging around in there. Not to mention the copper itself isn't straight all around the edges. I doubt it will be a performance hit but I'm not sure. I'll edit this post when I'm off work to include a picture of the inside of the GPU waterblock.
Re: watercooling prep
Posted: Fri Mar 13, 2009 4:46 pm
by DMB2000uk
Aww man, Sorry to hear it's all come to a halt.
Wonder how Kyle is getting on waiting for his parts. It's actually quite a heated 'race' with the holdups you both keep having!
Dan
Re: watercooling prep
Posted: Fri Mar 13, 2009 4:55 pm
by stev
If there is no immediate solution, you could always go to the hardware store and grab some SS stand-offs or order them through McMaster-Carr or Grainger.
It's always good to have a set of digital calipers for measuring things in millimeters.

I've been a DIY WCing guy for years; Putting kits and home-brew stuff on systems that things were not originally designed for.
Re: watercooling prep
Posted: Fri Mar 13, 2009 5:54 pm
by stopthekilling77
Well the DIY part of it isn't too scary aside from parts being expensive, but the problem here is that the standoffs are riveted to the block that fits my GPU. Only way I can see to fix this myself is to grind down the standoffs but I don't have the equipment to do it properly
Re: watercooling prep
Posted: Sat Mar 14, 2009 2:21 am
by Alathald
DMB2000uk wrote:Wonder how Kyle is getting on waiting for his parts. It's actually quite a heated 'race' with the holdups you both keep having!
Kyle is currently leak-testing atm...Kyle also likes talking about himself in the third-person and hasn't had setbacks so much as a case of the lazys.
Anyways, I'll update my thread later, I need some sleep! Hope you get your mounting issues straightened out soon.
