How to Setup A Watercooled System : A Guide in Pictures
Component List
1. Pump - MCP355â„¢ 12 VDC Pump
2. Waterblock - Swiftech Apogee
3. Tubing - TYGON® Silver Antimicrobial Tubing
4. Reservoir - Swiftech MCRES-MICRO
5. GPU Block - Swiftech MCW60 VGA Cooling
6. Radiator - Black Ice® Xtreme 2
7. Pump Top - Petra'sTech DDCT-01s Custom Delrin DDC Pump Top
8. Hose Clamps - Stainless Steel Worm-Drive Hose Clamp
9. Bactericide - Antifreeze
10. Fans - YATE LOON 120mm Case Fan - D12SL-12
***Disclaimer***
These is only what is in my system, some people may suggest other components but that is completely up to the system builder, this is intended only as a guide as to how to setup such a system
How to Setup a Watercooled System
-
dicecca112

- Site Admin

- Posts: 5014
- Joined: Mon Mar 01, 2004 10:40 am
- Contact:
How to Setup a Watercooled System
Last edited by dicecca112 on Sat Mar 24, 2007 5:20 pm, edited 5 times in total.

-
dicecca112
- Site Admin
- Posts: 5014
- Joined: Mon Mar 01, 2004 10:40 am
- Contact:
Initial Pre-Setup
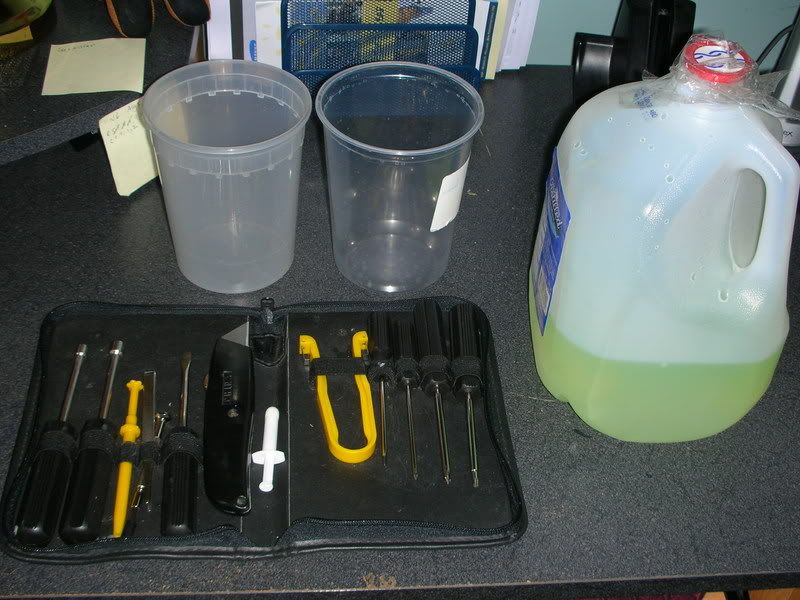
Here is the tools you'll need
1. A way to cut pipe. Scissors, Box Cutter or any Blade works
2. A Phillips Screw Driver
3. Something to hold your screws
4. Your Coolant of Choice
The old mantra measure twice cut once is key here.
Your best bet is to attach the components without tubing and place everything in your system. Try to visualize the bends and where you might place tubing.
Consider things like filling and bleeding when you decide.
There is a myth out there that the order of your loop is important. Its not true. Assemble your loop in the order that uses the least amount of tubing.
Last edited by dicecca112 on Wed Mar 28, 2007 5:04 pm, edited 1 time in total.
-
dicecca112
- Site Admin
- Posts: 5014
- Joined: Mon Mar 01, 2004 10:40 am
- Contact:
Assembly
Attaching the CPU Waterblock to the Motherboard
This will differ from block to block. But mainly its attach the bolts to the motherboard and slide the waterblock on. Then tighten the bolts in an X pattern
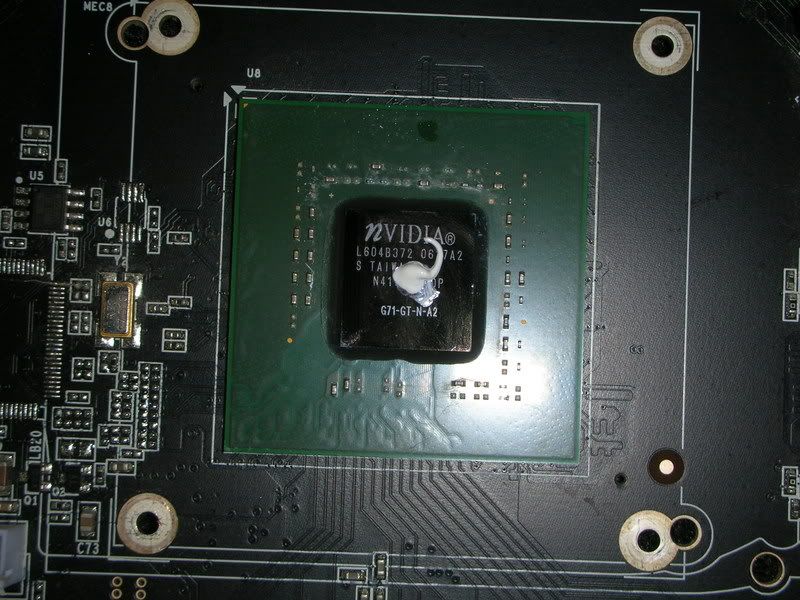
Attaching the GPU Waterblock to the Video Card
First remove your stock cooling. Be careful to not damage the card. Using at least 70% Isoproprol Alcohol and Q-Tips wipe off the stock thermal grease and apply your thermal grease of choice.
If should look like the picture below
Then mount the card. It should look like this
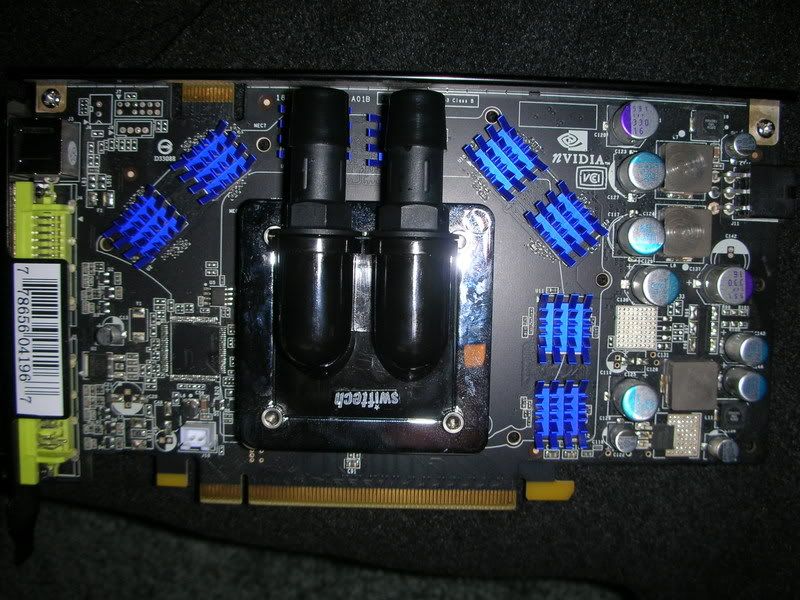
Installing the Reservoir
Depending on the reservoir, some mount in the 5.25 bay, other just screw to the side. Others decide to use a T Line, which is just a vertical piece of tubing that you use to fill the loop.
Installing the Radiator
Attach the Barbs and your good to go.
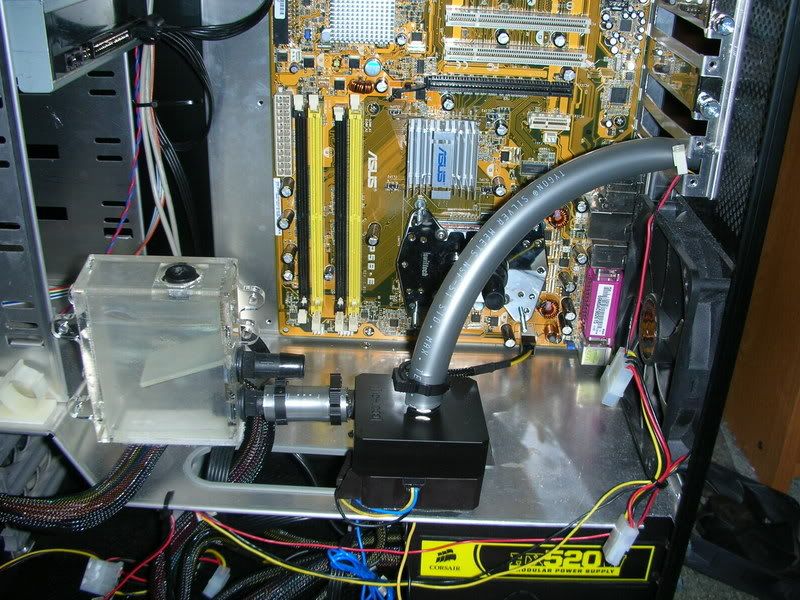
Installing the Pump
Attach the barbs and your good to go. Make sure that you never run the pump dry.
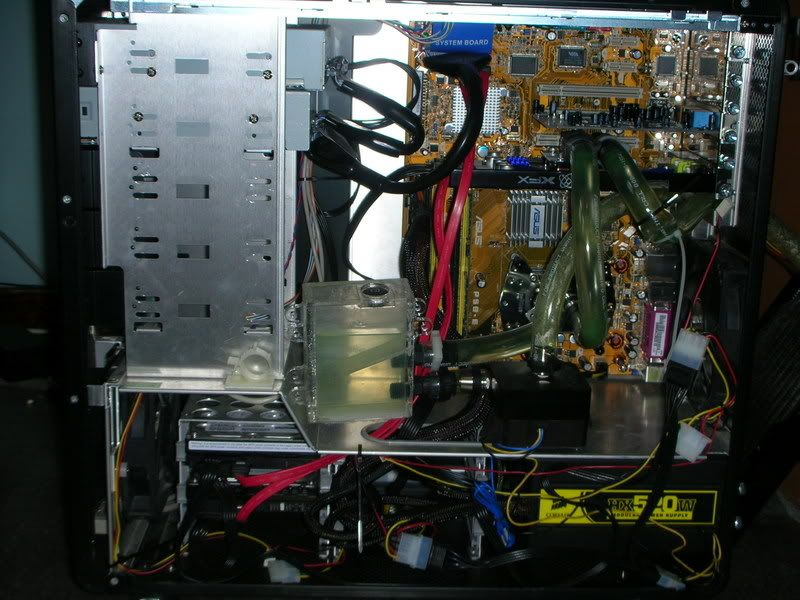
Below is a picture of the pump and reservoir installed
Attaching the CPU Waterblock to the Motherboard
This will differ from block to block. But mainly its attach the bolts to the motherboard and slide the waterblock on. Then tighten the bolts in an X pattern
Attaching the GPU Waterblock to the Video Card
First remove your stock cooling. Be careful to not damage the card. Using at least 70% Isoproprol Alcohol and Q-Tips wipe off the stock thermal grease and apply your thermal grease of choice.
If should look like the picture below
Then mount the card. It should look like this
Installing the Reservoir
Depending on the reservoir, some mount in the 5.25 bay, other just screw to the side. Others decide to use a T Line, which is just a vertical piece of tubing that you use to fill the loop.
Installing the Radiator
Attach the Barbs and your good to go.
Installing the Pump
Attach the barbs and your good to go. Make sure that you never run the pump dry.
Below is a picture of the pump and reservoir installed
Last edited by dicecca112 on Wed Mar 28, 2007 5:03 pm, edited 2 times in total.
-
dicecca112
- Site Admin
- Posts: 5014
- Joined: Mon Mar 01, 2004 10:40 am
- Contact:
Finishing the Loop
Attaching the Tubing
Simple, just push on the tubing. Some times tubing can be hard to get on, sometimes warm water helps to stretch the tubing
Attaching the Hose Clamps
I use plastic clamps some people use worm drive clamps. If you use the worm drive clamps be careful not to overtighten, it can cut the tubing
Filling and Leak Testing
Always fill and leak test outside of the case. Most people have a cheap 250W PSU on hand to do this. connect everything together, and place it in the sink, just in case it leaks, to catch the water. With the PSU and all the wires in a dry spot, jump the PSU with a PSU tester or a wire. Let it run for a good 10minutes. Check for leaks and fix if needed.
-
dicecca112
- Site Admin
- Posts: 5014
- Joined: Mon Mar 01, 2004 10:40 am
- Contact:
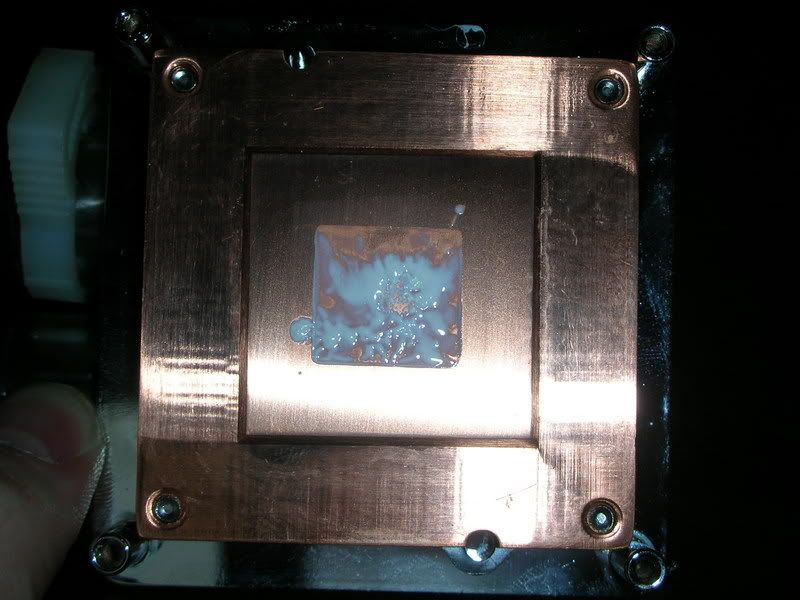
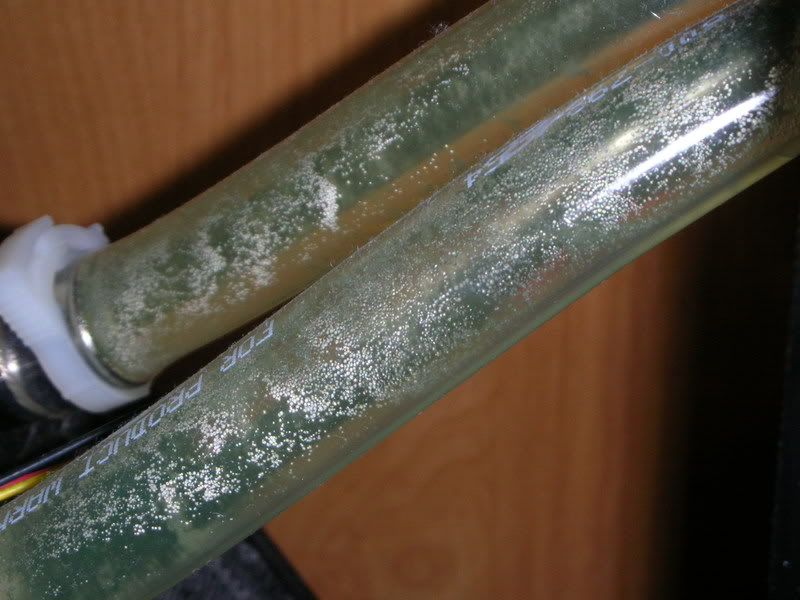
Bleeding
You want to get all the air out of the loop. Air is bad, it hinders cooling
As in the picture you want to get all these little bubbles out
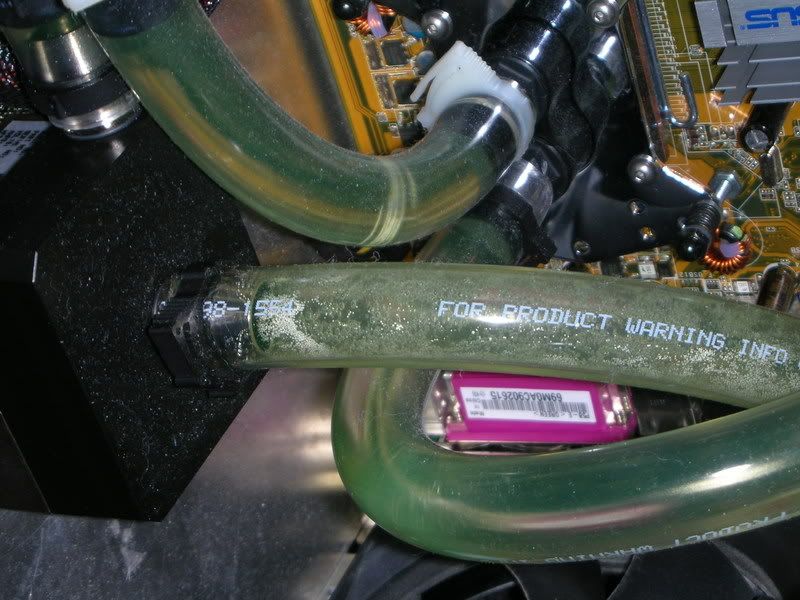
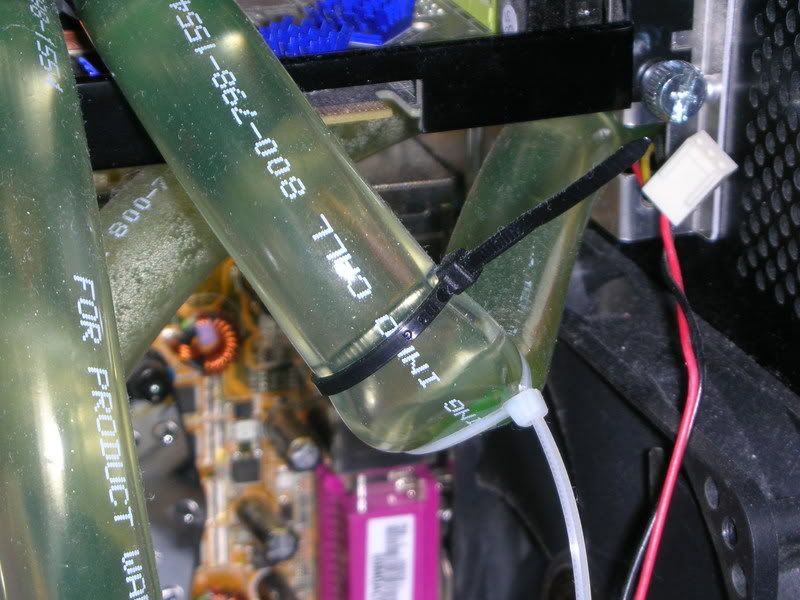
What you don't want to Happen
Kinks
These are bad and restrict flow and cause bubbles to accumulate. Thats not good.
Your Finished!
You know how a fully finished and working watercooled system. Enjoy the Temps!
You want to get all the air out of the loop. Air is bad, it hinders cooling
As in the picture you want to get all these little bubbles out
What you don't want to Happen
Kinks
These are bad and restrict flow and cause bubbles to accumulate. Thats not good.
Your Finished!
You know how a fully finished and working watercooled system. Enjoy the Temps!
-
dicecca112
- Site Admin
- Posts: 5014
- Joined: Mon Mar 01, 2004 10:40 am
- Contact:


-
dicecca112
- Site Admin
- Posts: 5014
- Joined: Mon Mar 01, 2004 10:40 am
- Contact:


-
dicecca112
- Site Admin
- Posts: 5014
- Joined: Mon Mar 01, 2004 10:40 am
- Contact:

-
dicecca112
- Site Admin
- Posts: 5014
- Joined: Mon Mar 01, 2004 10:40 am
- Contact:
-
=LAS=Hellfire
- Legit Enthusiast

- Posts: 31
- Joined: Sun Jul 09, 2006 10:31 am
- Contact:
Re: How to Setup a Watercooled System
that surprises me that it only dropped your temps by 2C. ehh i personally dont like the idea of watercooling, it seems like a hassle, but great tutorial. If i ever decide to go with water cooling, Ill check back here 

-
dicecca112
- Site Admin
- Posts: 5014
- Joined: Mon Mar 01, 2004 10:40 am
- Contact:

Re: How to Setup a Watercooled System
going from what to what? 2C isn't bad at all just for changing tubing.dicecca112 wrote:that was referring to the change in tubing.
-
dicecca112
- Site Admin
- Posts: 5014
- Joined: Mon Mar 01, 2004 10:40 am
- Contact:
Re: How to Setup a Watercooled System
Hmm... I'll keep that in minddicecca112 wrote:ClearFlex to Silver Tygon. The Clearflex was kinking
-
martini161

- Mr Awesome

- Posts: 3183
- Joined: Sat Sep 08, 2007 8:27 pm
- Location: Cherry Hill, New Jersey
Re: How to Setup a Watercooled System
nice tut, im thinking about water cooling. is installing a north bride block any different from this? for my new rig i want to have the cpu and north bridge on the loop, for uber insane fsb overclocks. im just worried about the rest of the things attached to my nb heatsink on my p5k premium. i dont want to leave them without any cooling  btw i can sell you my wii... for the right price

Dan:3Martin:3 "my manhood is so big if i put it on the keyboard it would stretch from A to Z!"-Anonymous